This page has detailed instructions for making a reservation, picking up your key and vehicle, and returning your rental and key. For general information on signing up for a UCAR account, who is eligible to rent, and mandatory Driver & Safety Awareness training, please review the Vehicle rental (UCAR) page.
Please be aware that you will need to pick up your rental and drop it off during the hours that the key manager is available at the UCAR location you are using.
If you have questions, don’t hesitate to reach out to the Fleet Services Rental Office by phone at 206-221-3594 or email at fsrent@uw.edu. Business hours are Monday through Friday from 7 a.m. to 3:30 p.m.
Before you start
You’ll need worktags associated with your user account to make reservations. Some worktags are already in our system, and some may need to be added.
- If you already have worktags associated with your account, you’re all set to make a reservation.
- If you are a new user, add your worktags during the initial account request to get privileges to make reservations.
- If your worktags aren’t listed, include them in the “notes” section, and we will add them to the system.
- If you already made an account without worktags, add them from the My Profile link in the left sidebar of the reservation system, under Additional information – Reservations. Then, email fsrent@uw.edu and ask for access to complete your request
- If your worktags aren’t listed, include them in the email to fsrent@uw.edu.
Making a reservation
Step 1
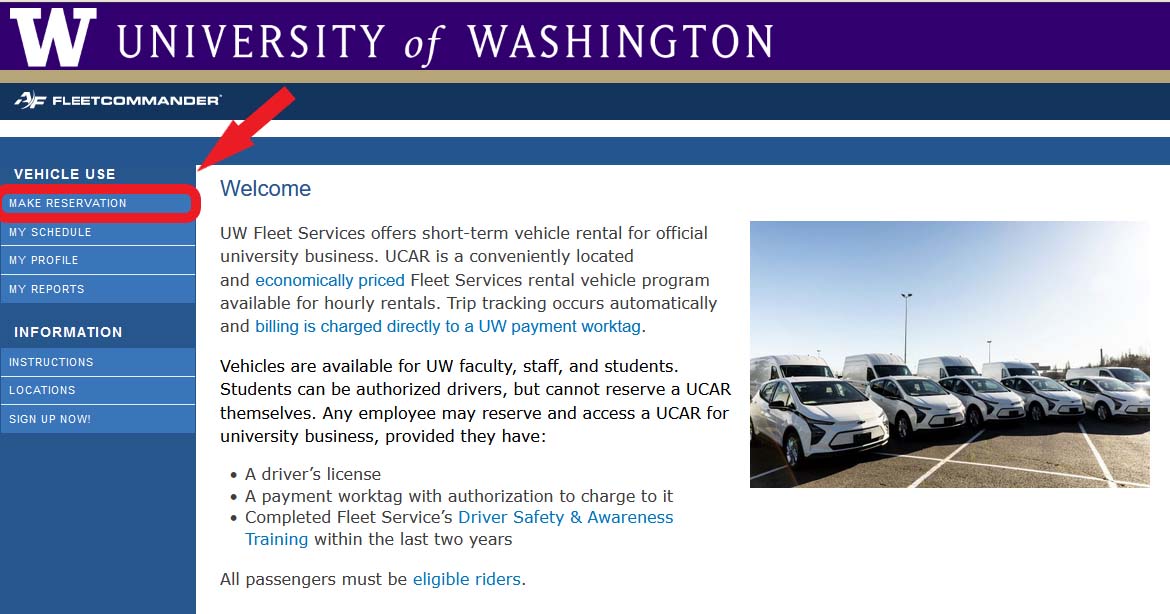
First, select Make Reservation on the reservation system's homepage.
Step 2
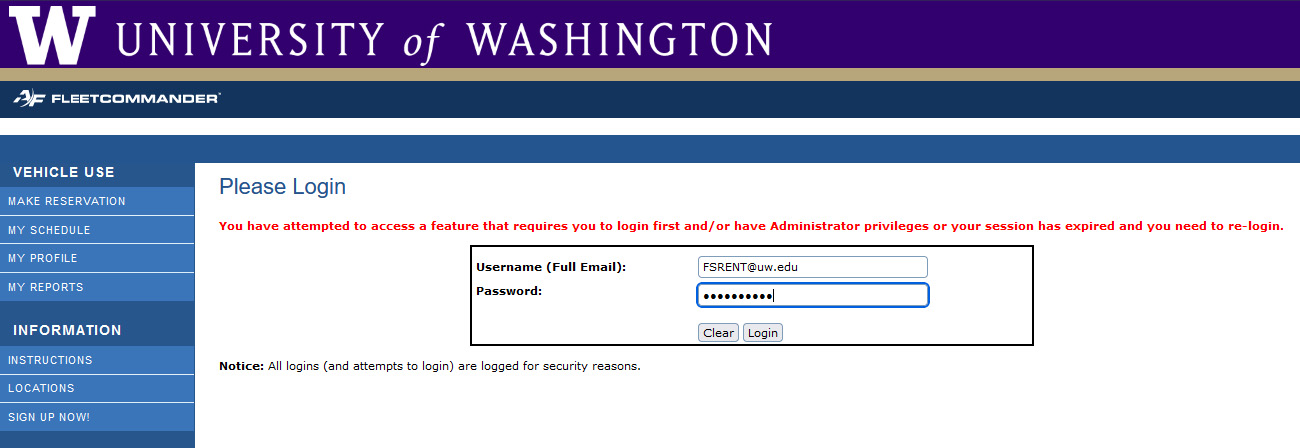
Here, you will be directed to log in. Enter your NetID with the full email address, and your NetID password.
Step 3
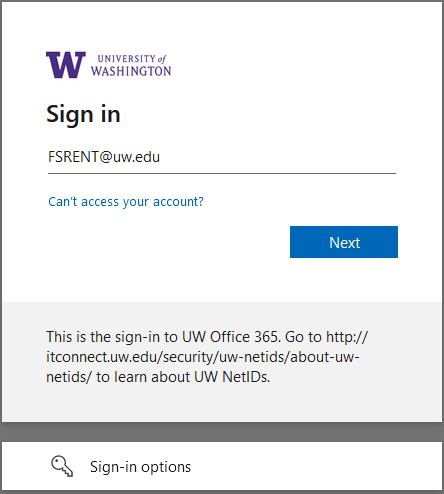
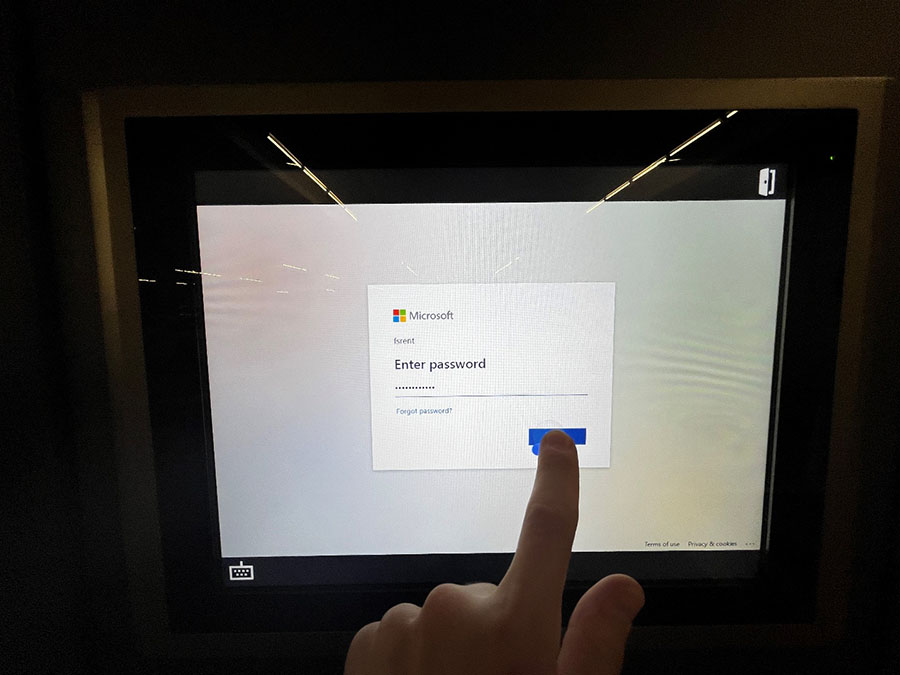
Next, the Microsoft Sign in dialog will appear. Again, enter your NetID with the full email address. You may encounter issues if you do not enter your full email address.
Step 4
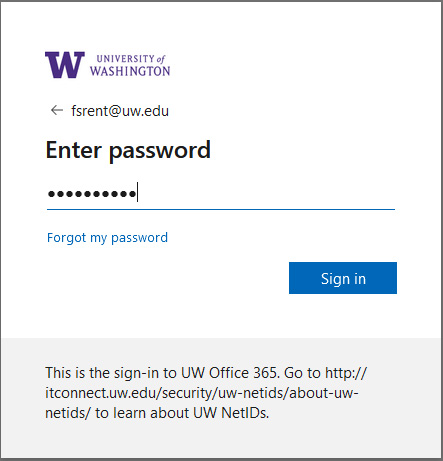
Next, enter your password again.
Step 5
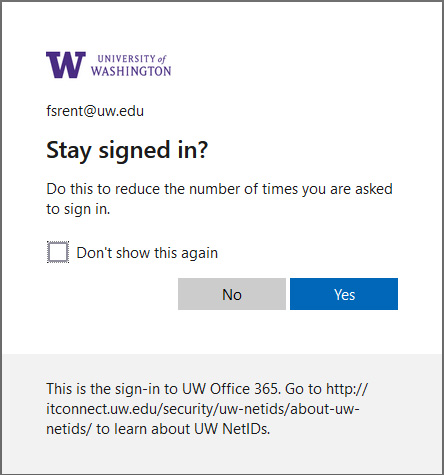
You will see a screen asking if you want to stay signed in. From here, you can choose either option. Neither option matters, as the reservation website (Agile) will keep you signed in as long as you don't clear your browser cookies.
Step 6
Once signed in, you may need to select Make Reservation again.

Step 7
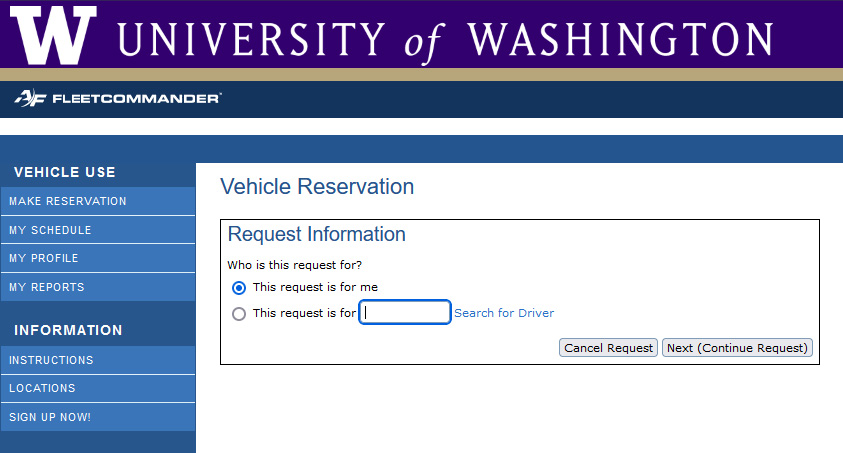
Next, choose whether this reservation is for you or another authorized driver. Then click Next (Continue Request).
Step 8
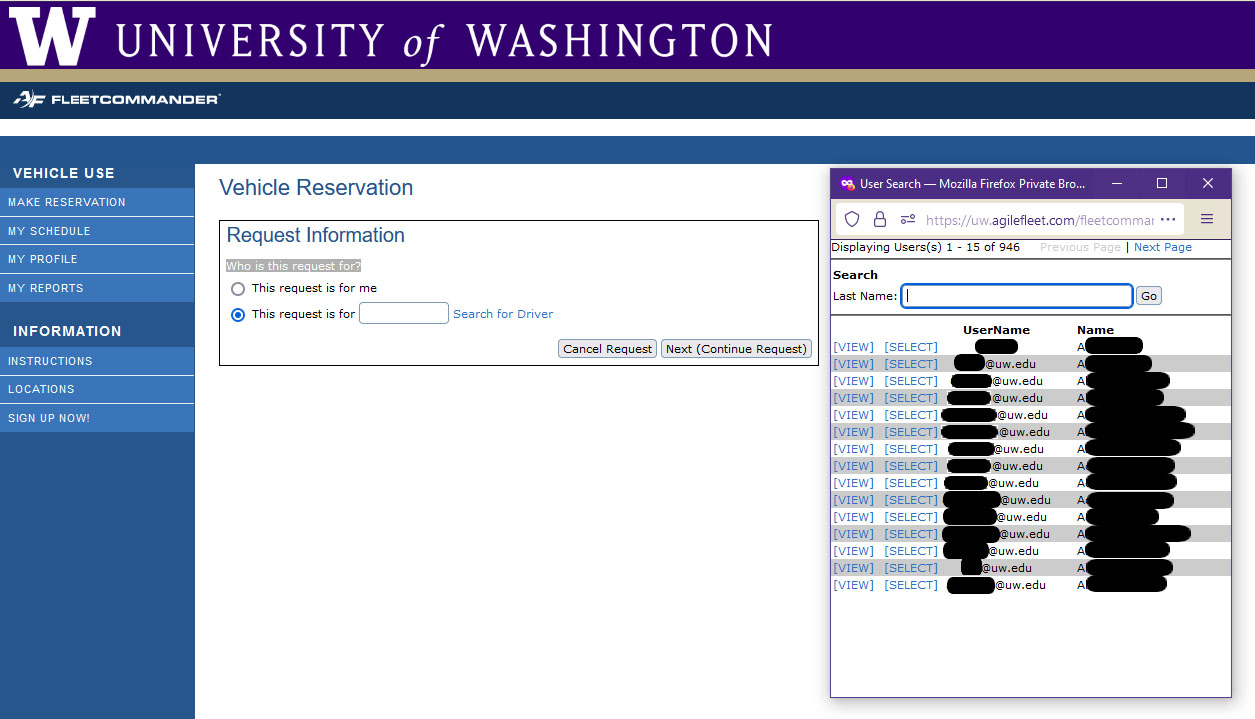
If you are creating a reservation for another authorized driver, select the second option and type their NetID (with the full email address) in the box. You can also click Search for Driver for a list of all authorized drivers and choose from that. Then click Next (Continue Request).
Step 9
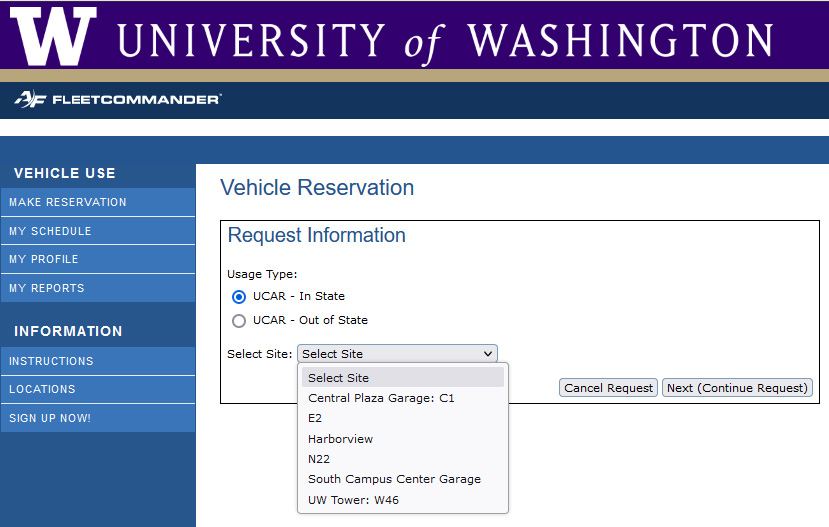
On the next page, choose whether you are driving the car in or out of state. Also, you must choose the UCAR site you want to reserve a vehicle from. For this demonstration, we will select "E2".
Step 10
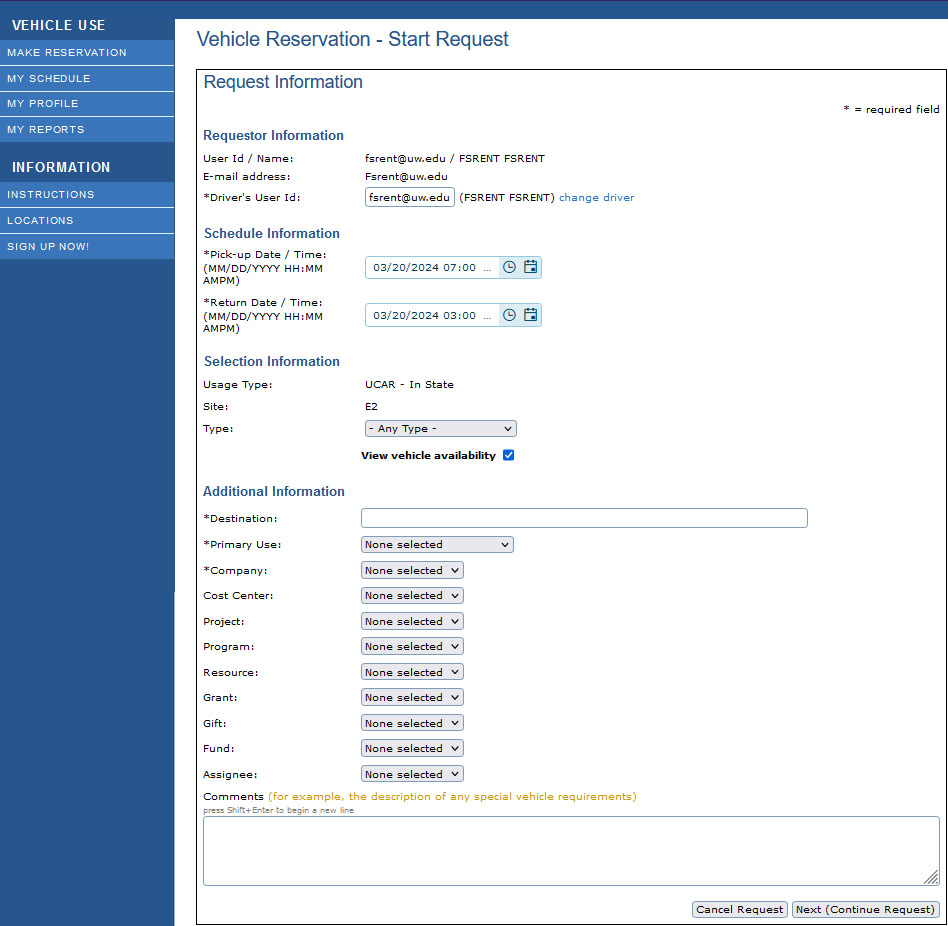
This is the vehicle request form. Select your pick-up and return date and time, the vehicle type, your destination, and your worktag information.
Step 11
First, make sure the Requestor Information is correct, including the driver information.

Step 12
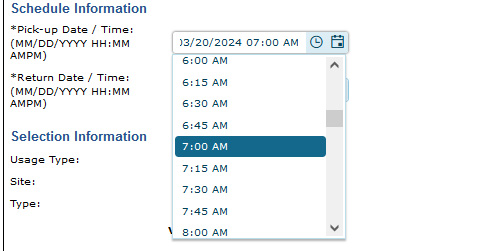
Then, pick your Pick-up Date / Time and your Return Date / Time. You can type the minutes in if you want a more precise pick-up/return time than the 15-minute intervals it pre-selects. Note that certain lots have limited hours for pick-up and return depending on the building hours for the building where the key manager is located.
Step 13
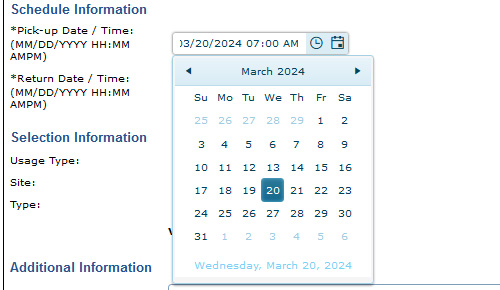
Select Date.
Step 14
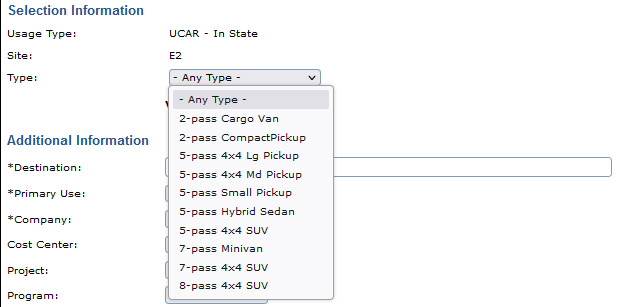
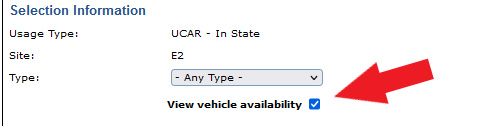
On the next section, select your preferred vehicle type.
Step 15
After selecting your preferred vehicle type, you can check the View vehicle availability checkbox. This will be relevant for the next screen, so we will return to it later.
Step 16
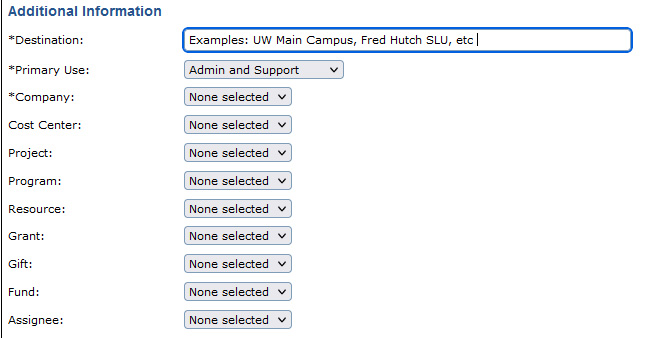
In the Additional Information section, start by typing your Destination. Just a brief description of where you are headed is fine for this.
Step 17
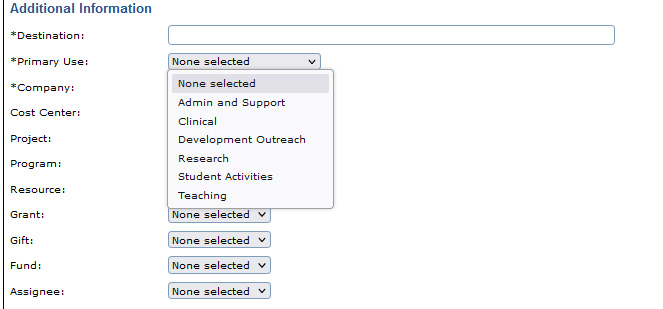
Then, select the Primary Use for the vehicle. If you are not sure what to choose, just select what feels like the most appropriate option for your intended use of the vehicle.
Step 18
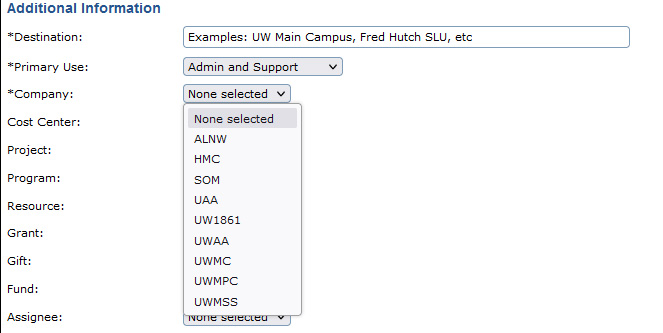
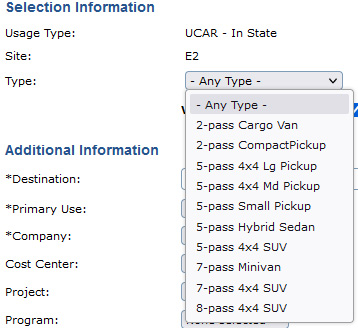
Next, you'll enter worktag information. When setting up an account and from your account settings page, you can pre-select your worktag information if you regularly charge to the same budget. Start by selecting your Company code.
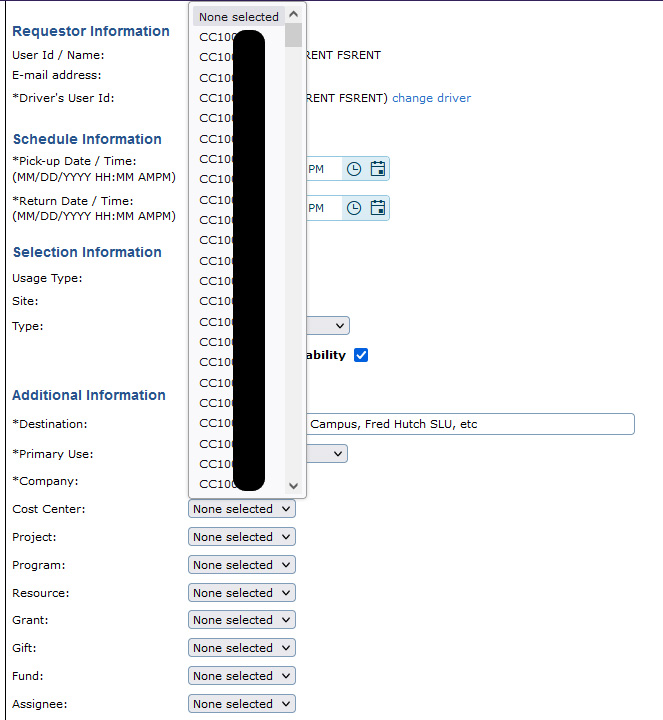
Step 19
For the next 8 fields after Cost Center, select the appropriate worktags. If you select the incorrect worktags, you may charge the wrong cost center. Pictured below is an example of the Cost Center list. When you click the box to select a tag, you can start typing your tag and it should start to move the selection based on what you type. If your worktag is not listed, reach out to the Fleet Services office.
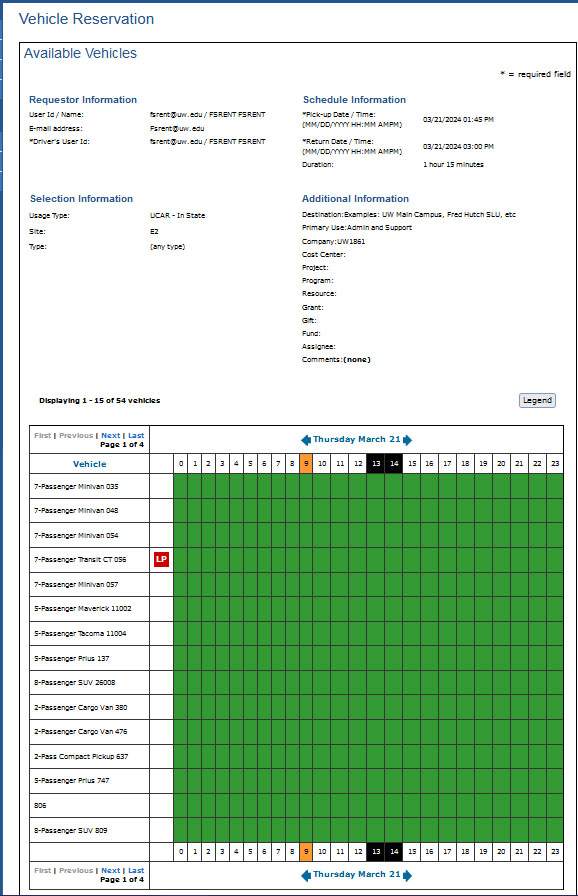
Step 20
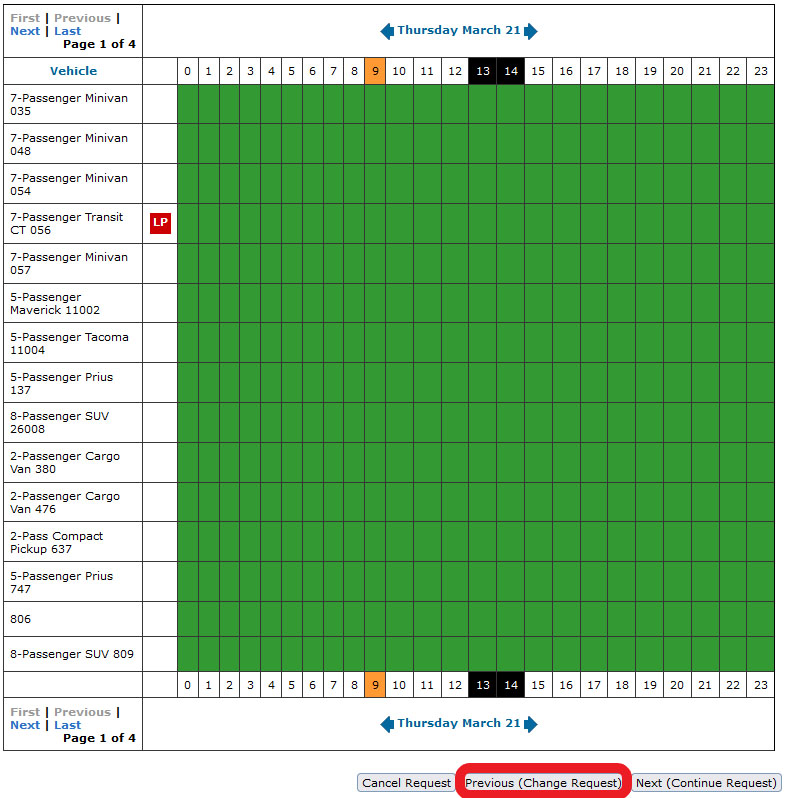
Once you’ve entered your worktags, you can proceed to the next screen. This is where the View vehicle availability checkbox from step 15 becomes relevant. If you checked that box, you will see a list of all the vehicles at the site. If you didn't choose a vehicle Type, you will be able to see every vehicle at the site. If you chose a vehicle Type, you will be able to see every vehicle of that type listed.
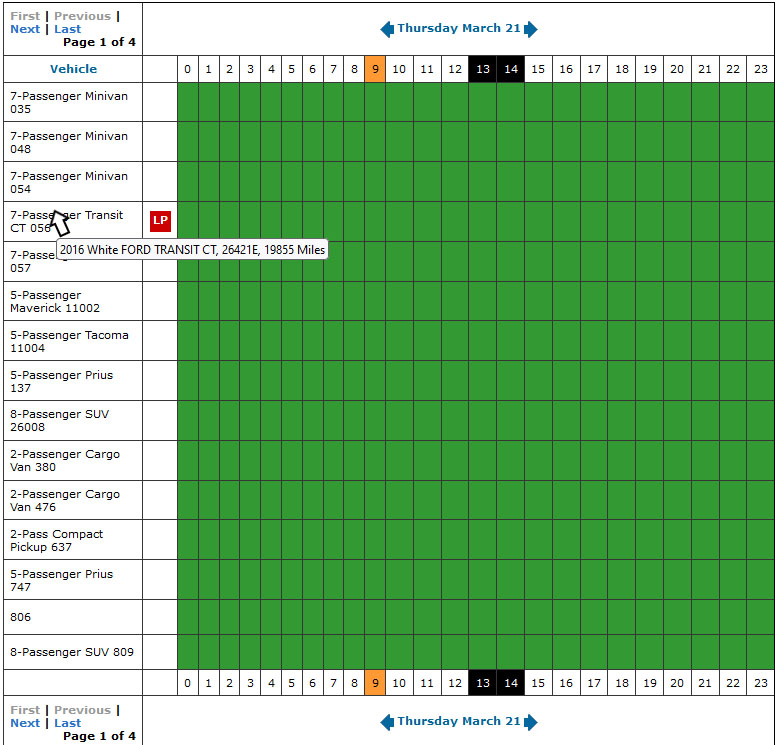
Step 21
By hovering your mouse over a vehicle name in the Vehicle column, you can read more information about it.
Step 22
You can click the Legend button above the availability table to see what the different icons mean on the list.
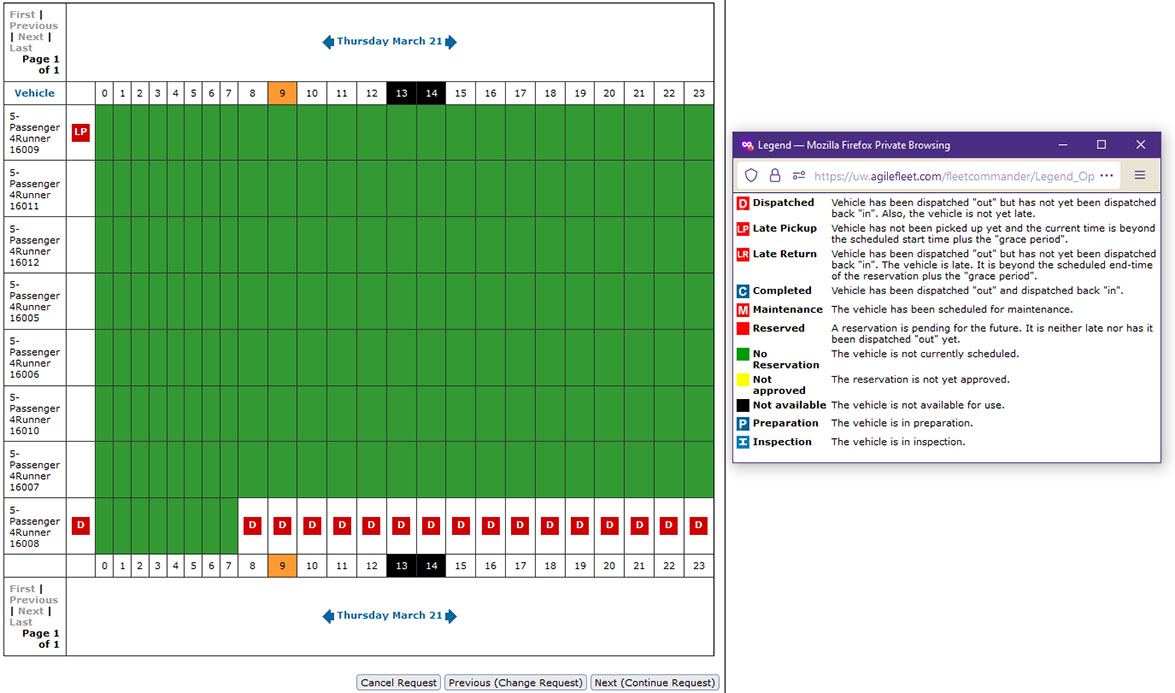
Step 23
If you didn't choose a vehicle Type on the previous page and want to now, you need to click the Preview (Change Request) button. This is highlighted in red in the screenshot below. If you don't choose a vehicle Type, the system will randomly assign an available vehicle for you to use.
Step 24
This time, select your preferred vehicle Type. Once on the the vehicle availability list screen again, make sure there is a vehicle of that type available. If there is not, select a different vehicle type. Once there is a vehicle available for the time you wish to reserve for, continue to the next screen.
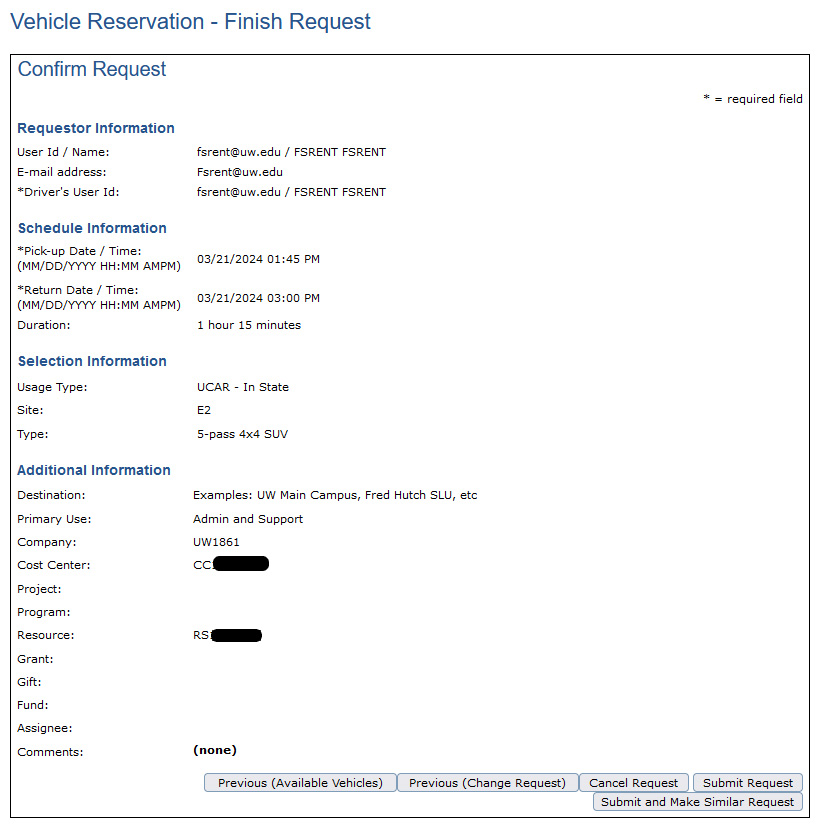
Step 25
On the last screen, make sure all the information is correct. If you wish to change anything, return to a previous screen using one of the options listed. The Previous (Available Vehicles) screen will return you to the list of vehicles. The Previous (Change Request) screen will return you to the screen shown in step 10 and allow you to modify anything about your reservation request including worktag information. Once you are happy with the request, click the Submit Request button.
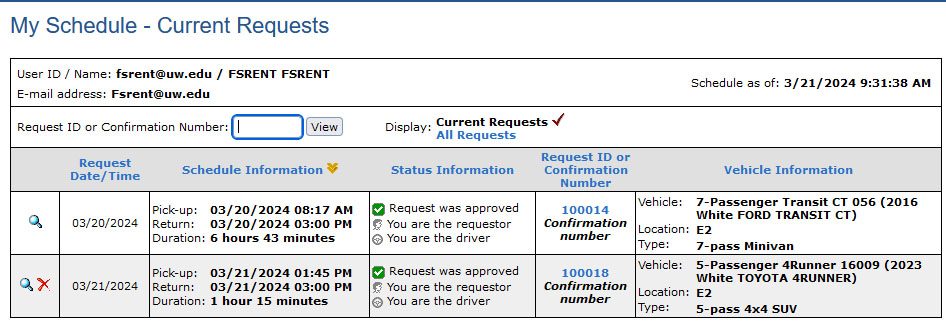
Step 26
All vehicle rental requests are reviewed by Fleet Services for manual approval. If your account is authorized to make requests and there are no conflicts with the options you choose, your request should be approved within 12-24 hours. On the My Schedule tab, you can see your status for each rental request. Feel free to reach out to the Fleet Services office if you have any questions or issues with your request.
Brief instructions
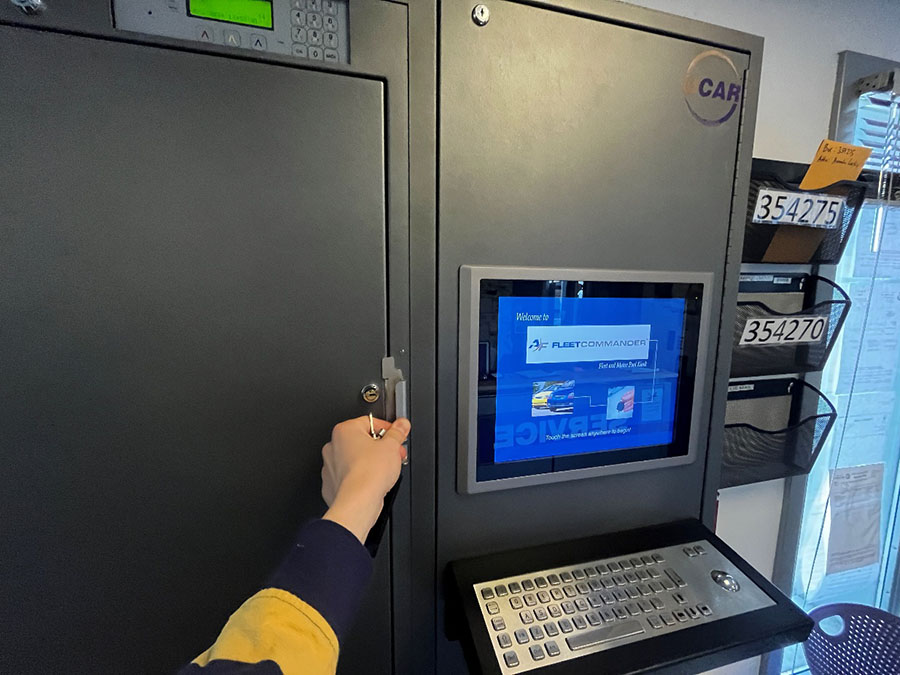
Open the key manager door by squeezing the handle, find your key (look for the green light), turn the key and pull the card out of the slot. Make sure you close the door to the key manager box!
Complete instructions for picking up your key and rental
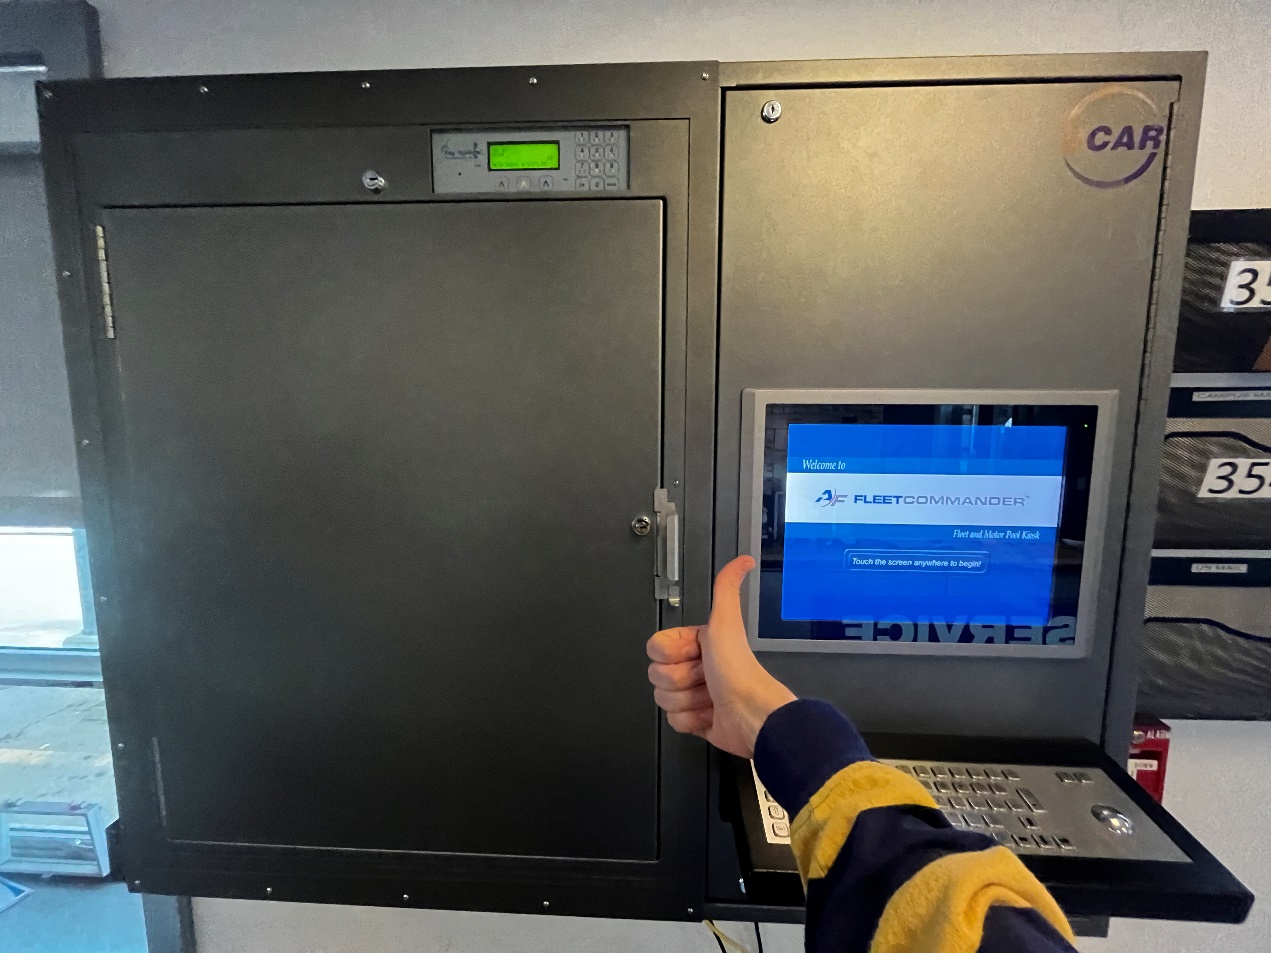
Step 1
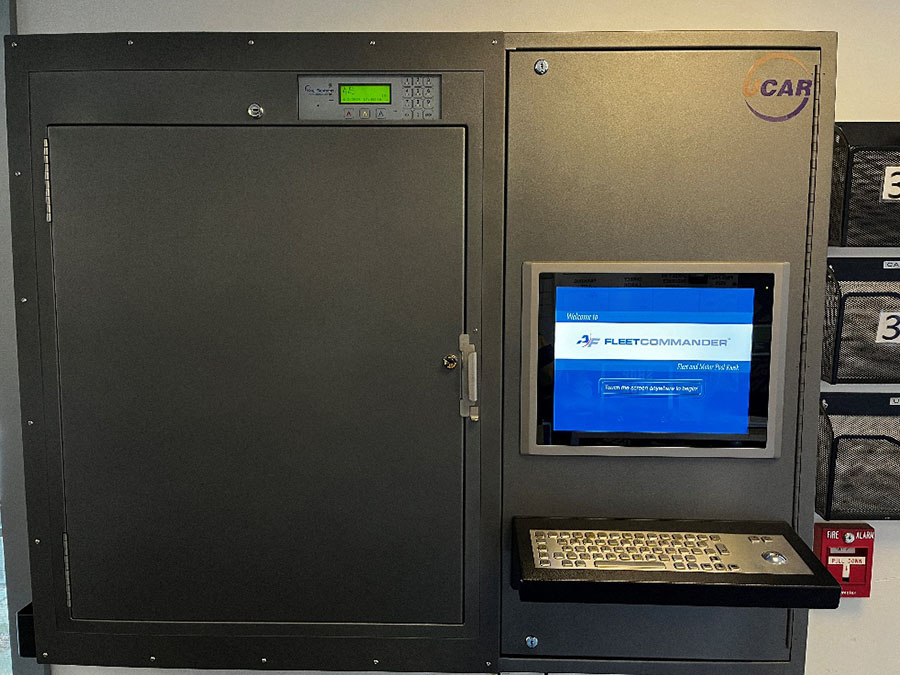
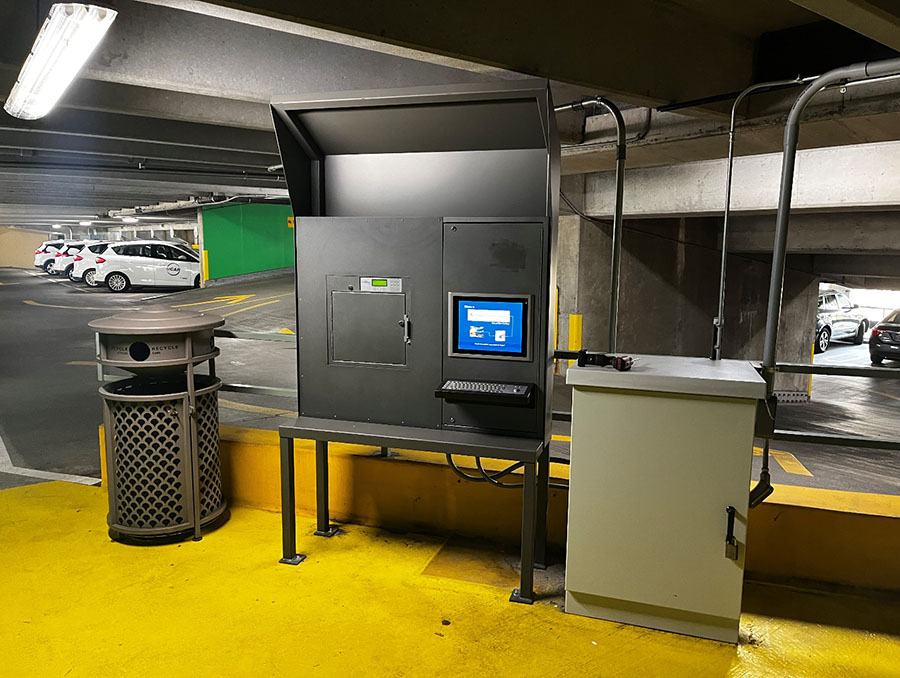
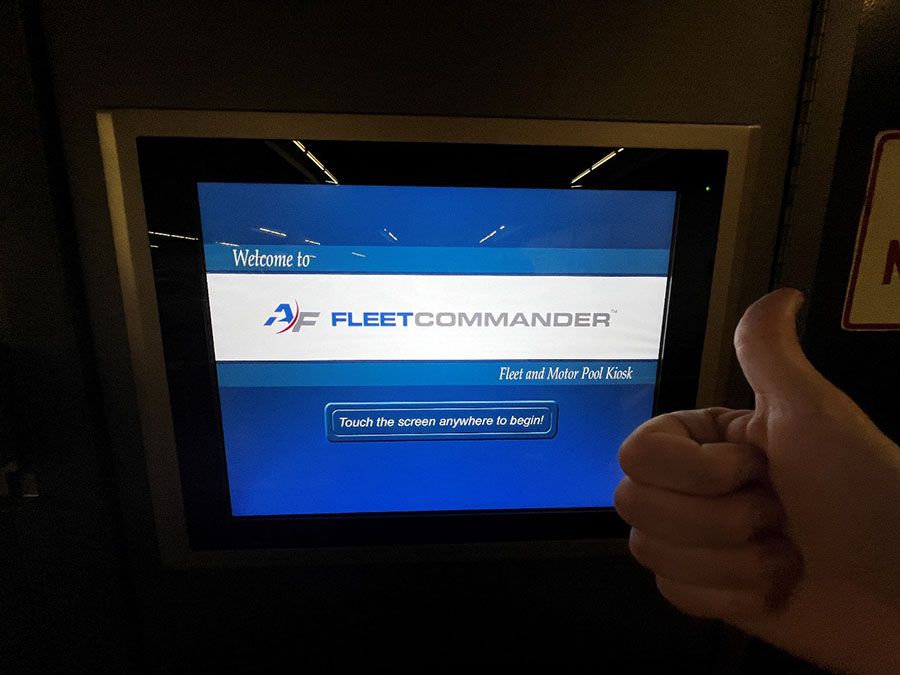
Approach the keybox. These are the three types of boxes you will encounter. They all function the same way.

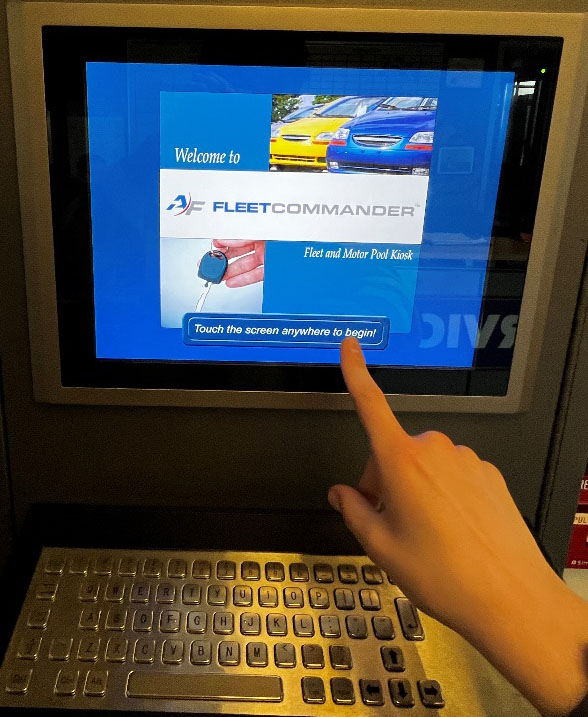
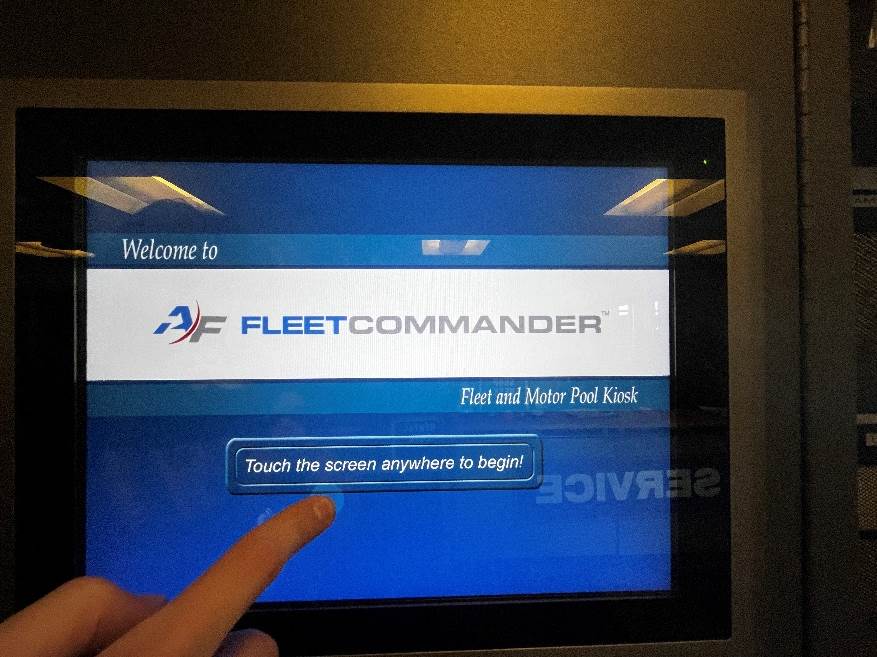
Step 2
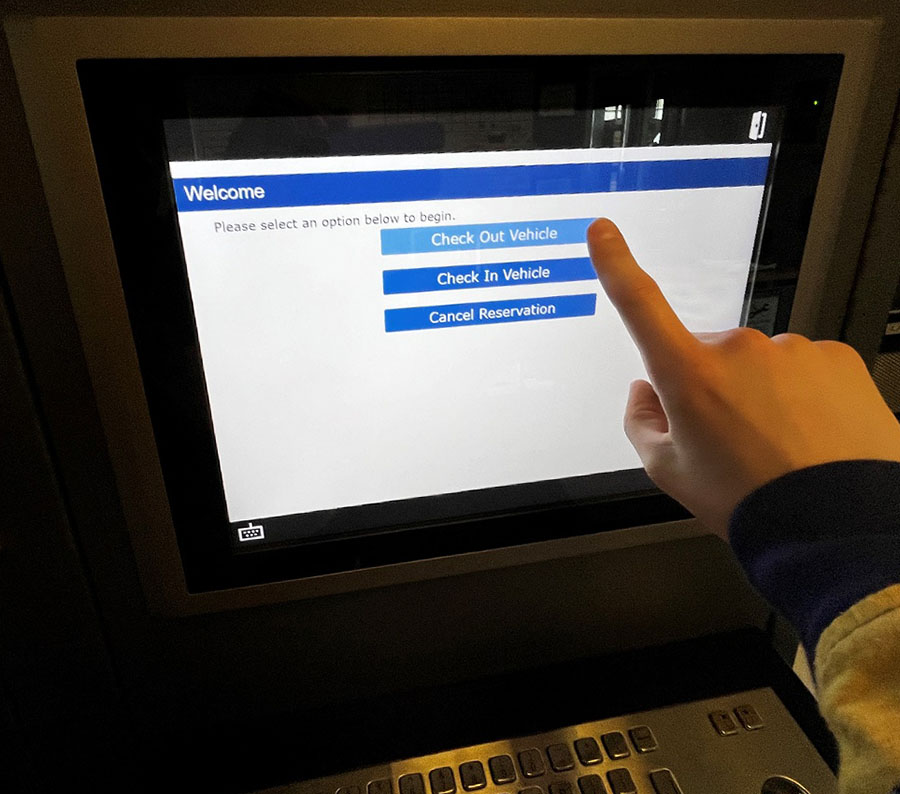
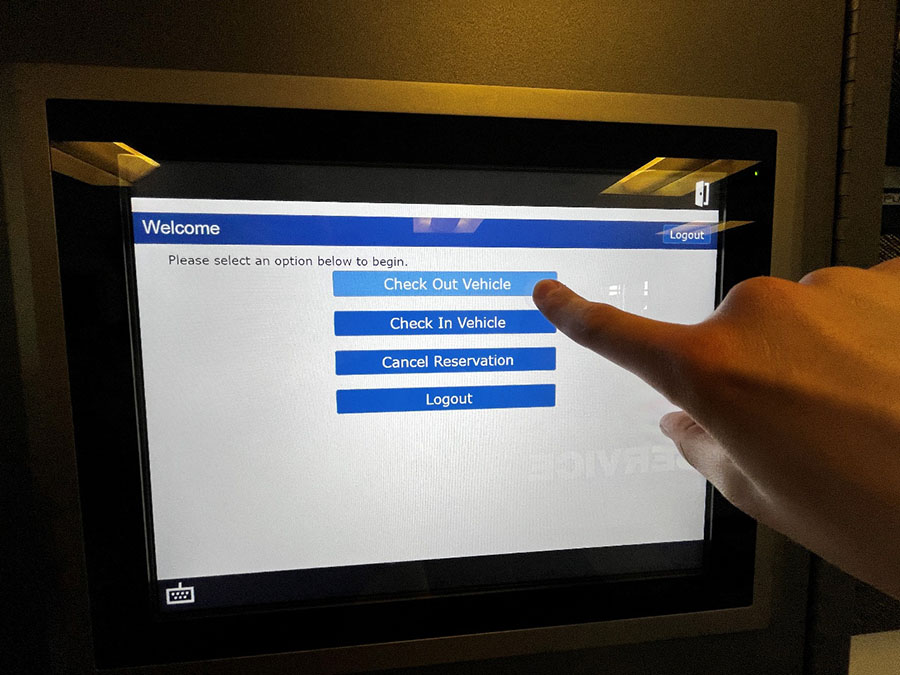
Tap the screen to start.
Step 3
Select Check Out Vehicle. If you accidentally select a different option, don't worry. All of them go to the same screen prior to logging in.
Step 4
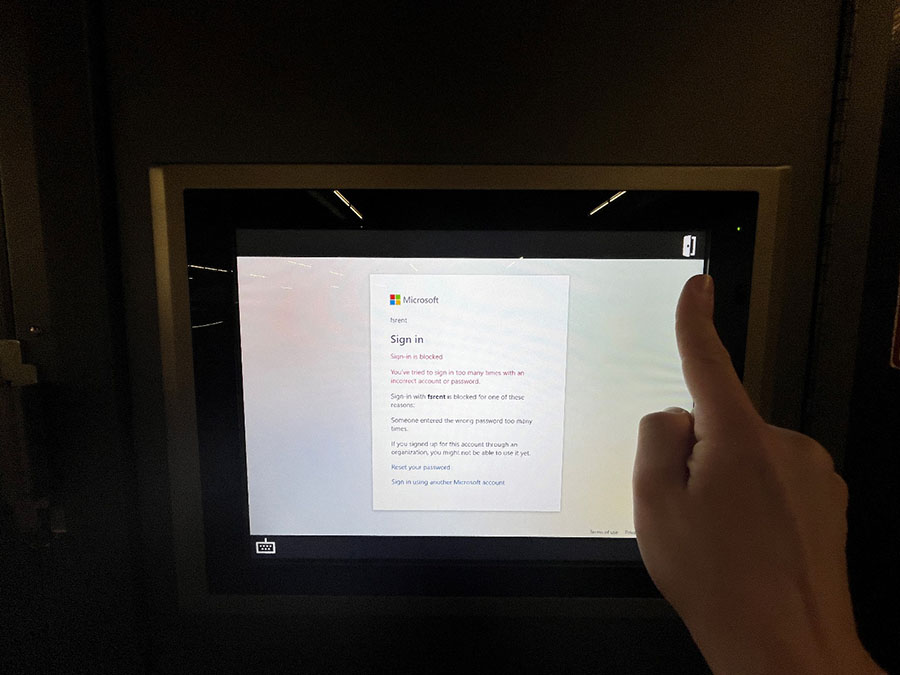
Type in your full UW email address.

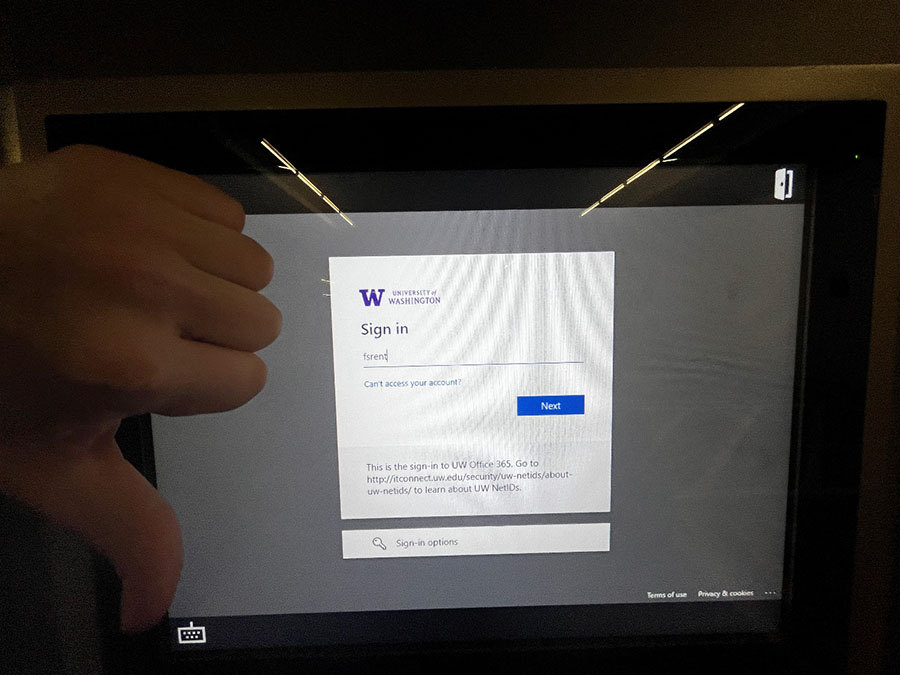
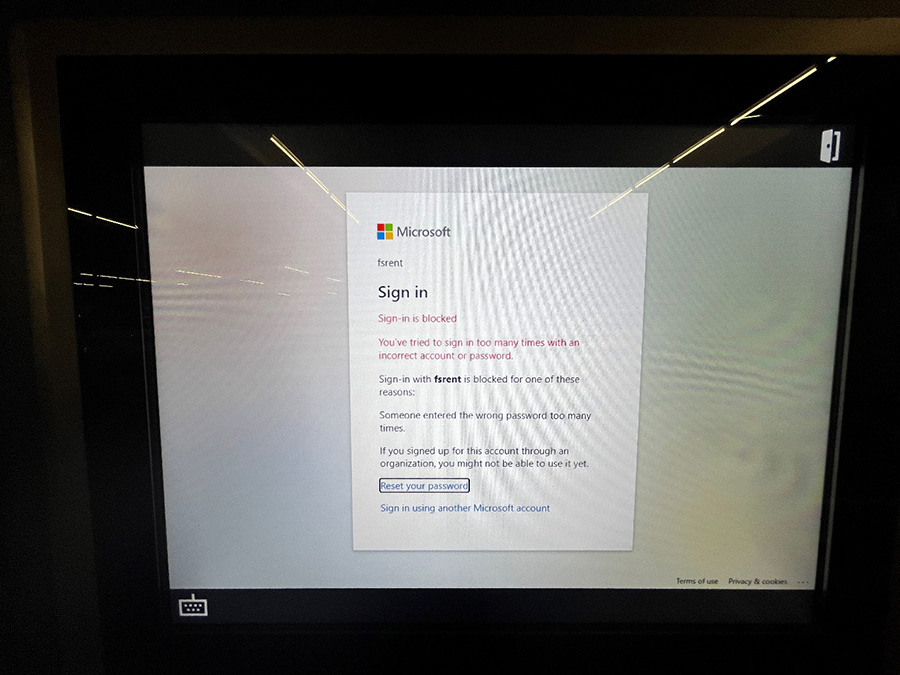
If you get an error screen, just hit the exit button in the top right to start over and return to the splash screen.
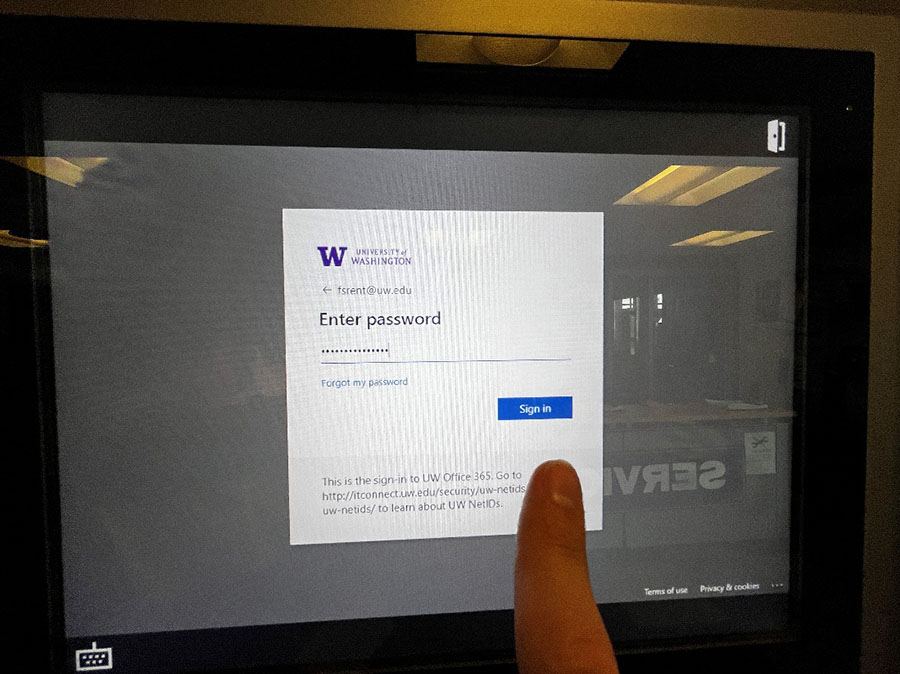
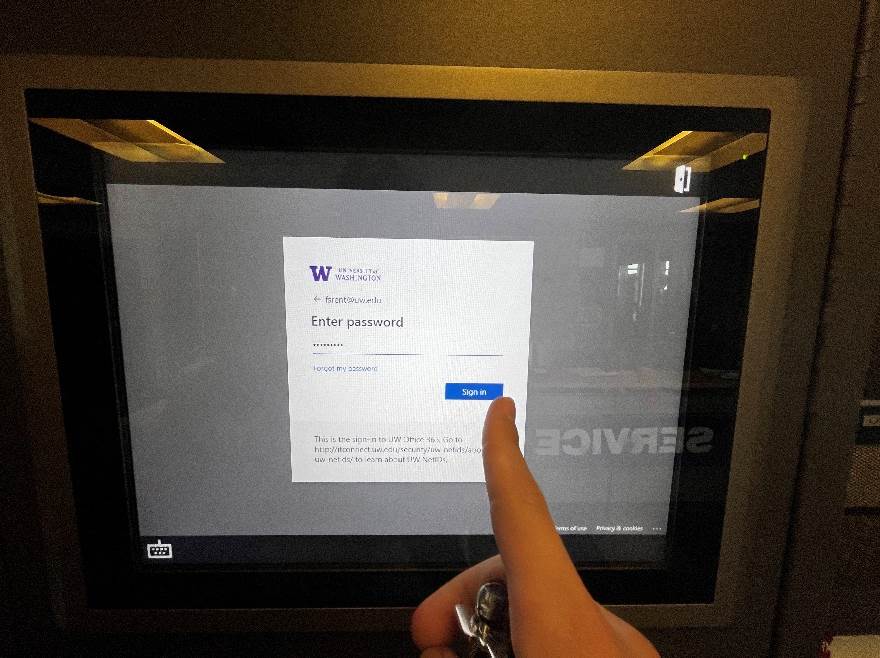
Step 5
Assuming you are doing it correctly and type in your full email address, the next screen should look like the image below, with the UW-specific login rather than the Microsoft one.
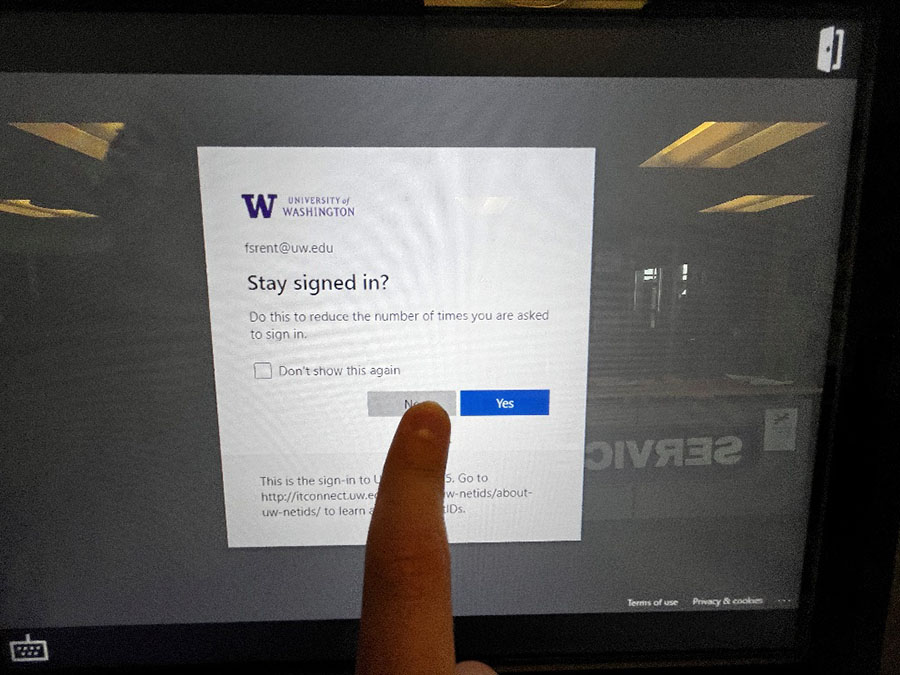
Step 6
When prompted with Stay signed in?, any option will progress you to the next screen. None of the options will do anything different. You will be logged out after retrieving your vehicle no matter what you choose. This box will always appear when you log in. So, just hit one of the options to continue.
Step 7
Now that you're logged in the screen will look the same as the first one. Tap the option you want. For vehicle pick-up, tap Check Out Vehicle.
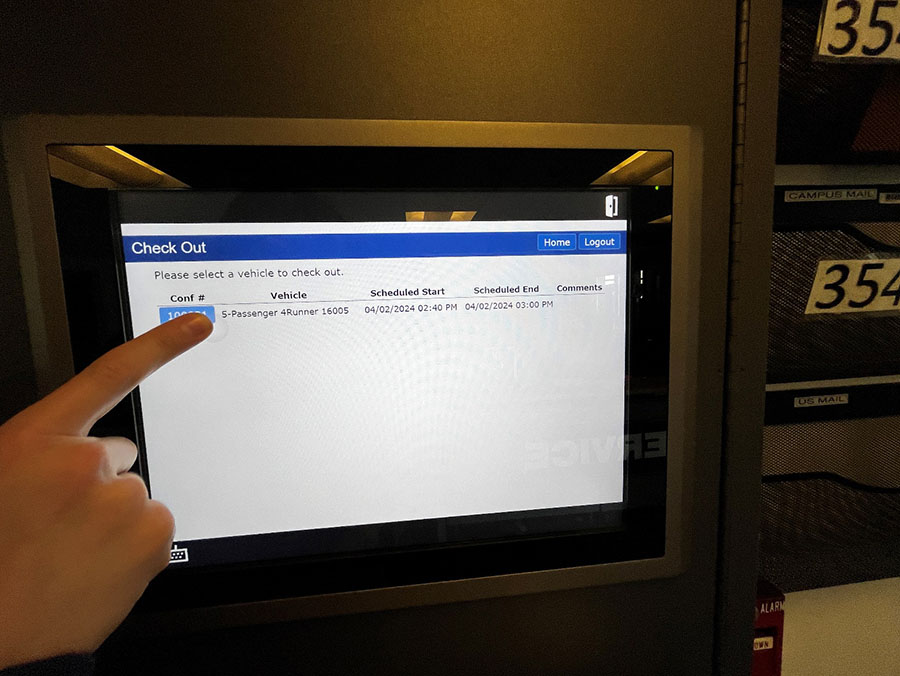
Step 8
Then, select your reservation. If you have multiple reservations, you may only select one at a time and will need to repeat the process for each vehicle.
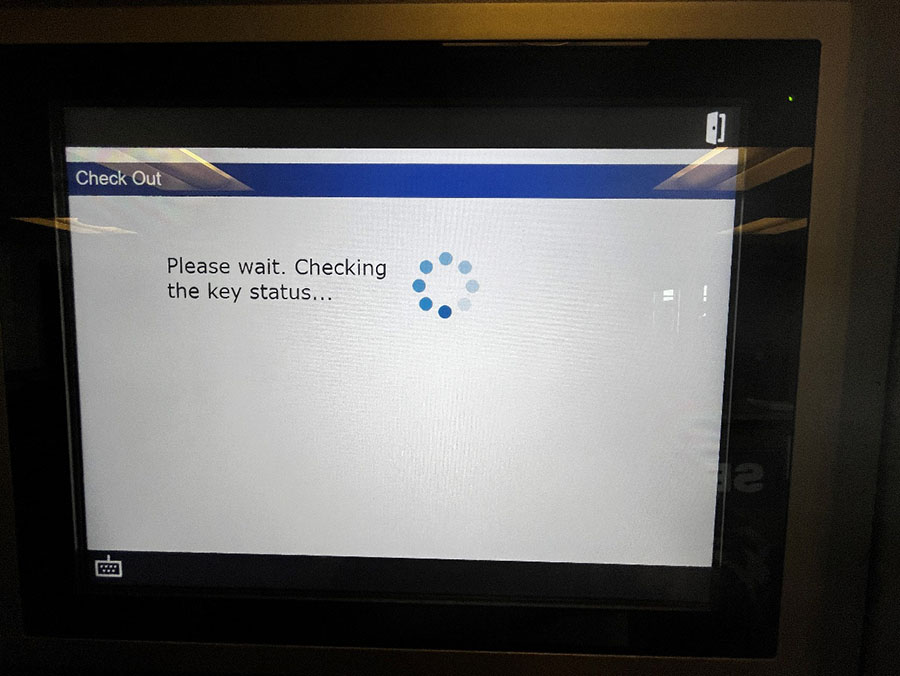
Step 9
Next, please wait until the key status check finishes...
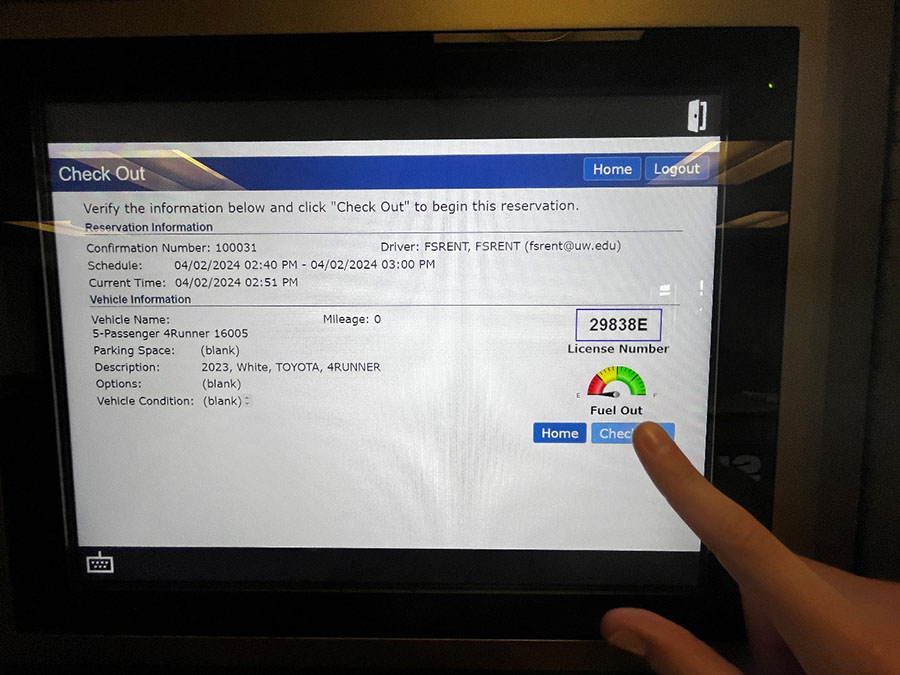
Step 10
If everything goes well, you will see the reservation verification screen. If not, contact the Fleet Services office. Verify the information is correct, then tap or click Check Out.
Step 11
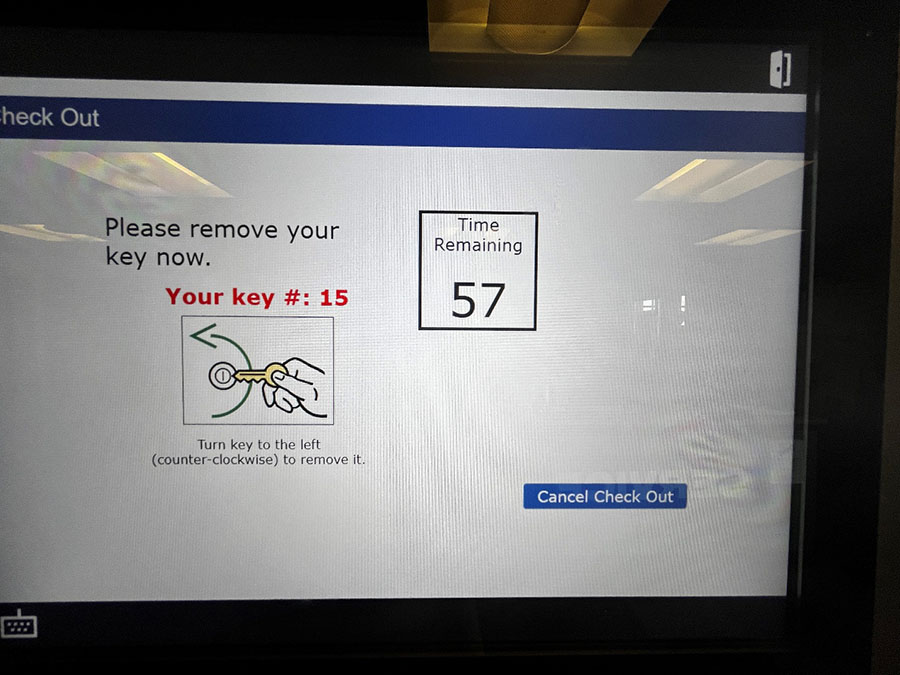
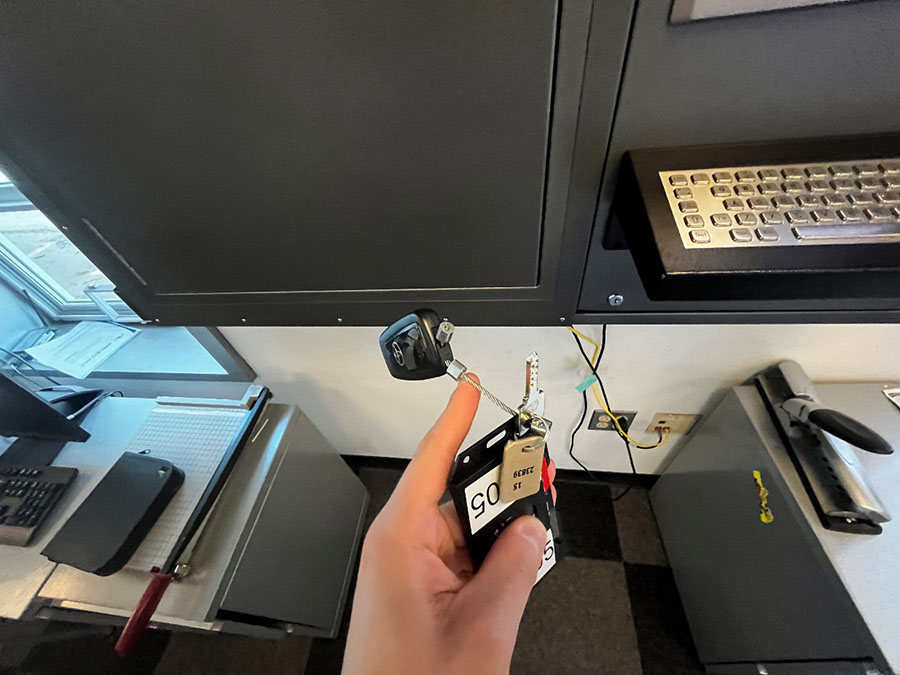
When you see the key number screen, open the key manager door and remove the key with the light above it.
Step 12
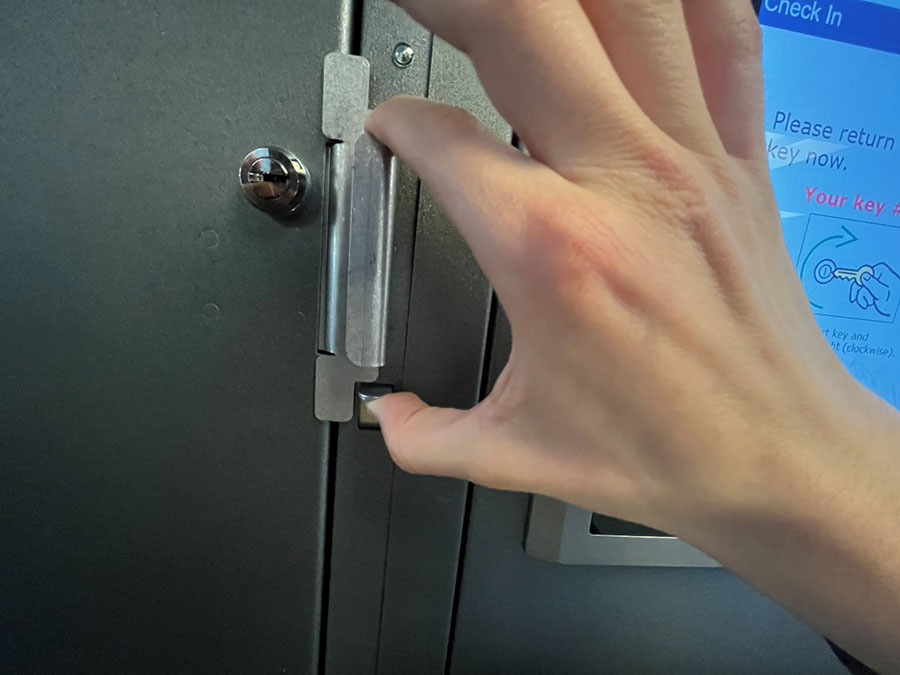
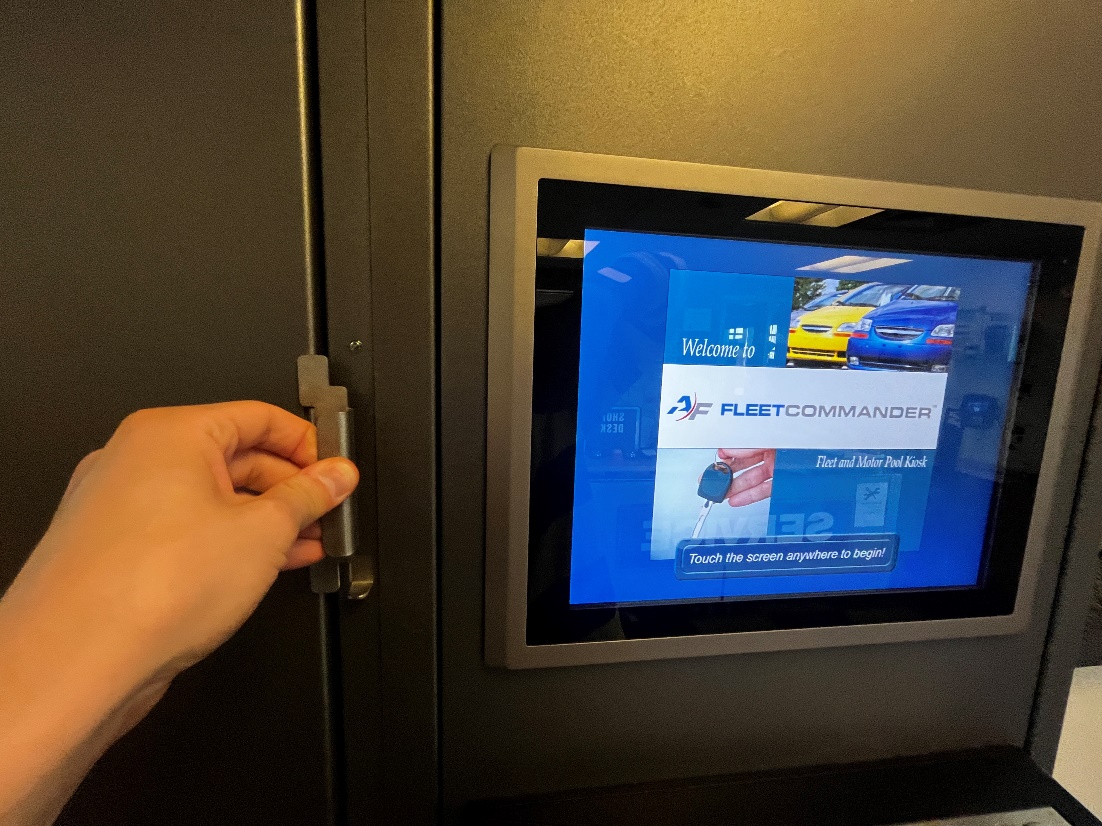
Open the door by squeezing the latch while pulling the handle.
Step 13
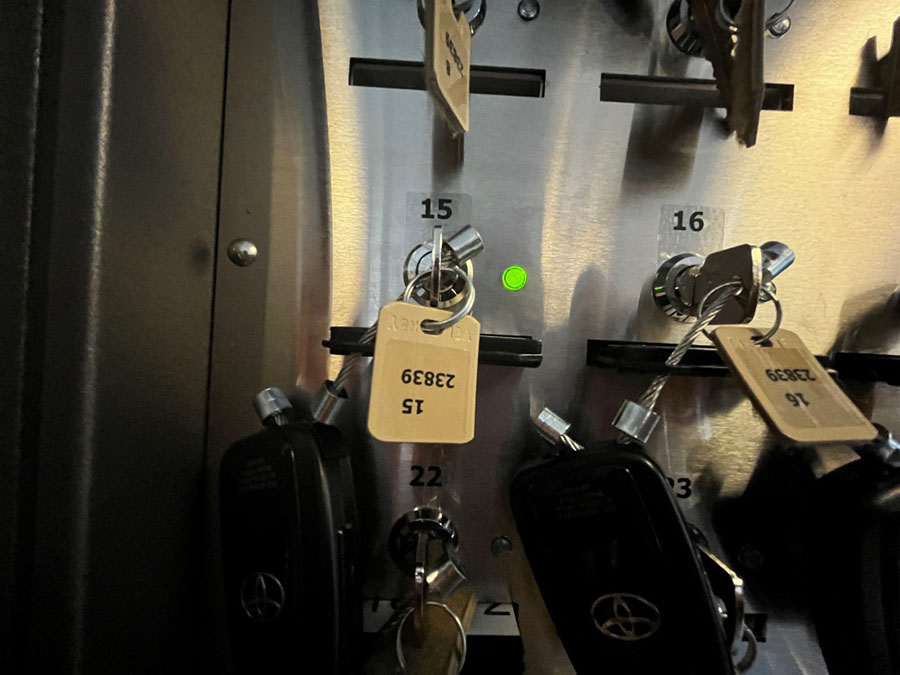
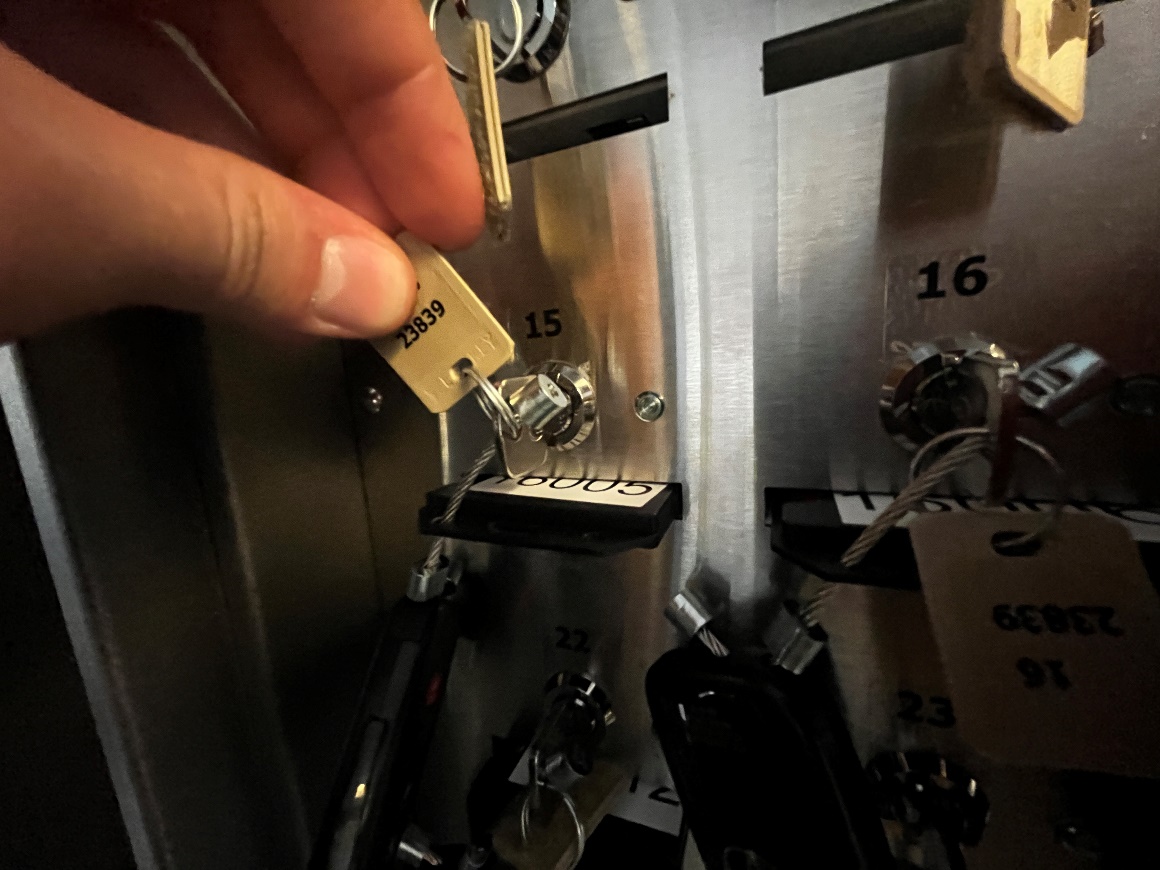
This is what the key manager box will look like when opened. Some may have more or less keys in them. Locate your key using the number and the green light.

Step 14
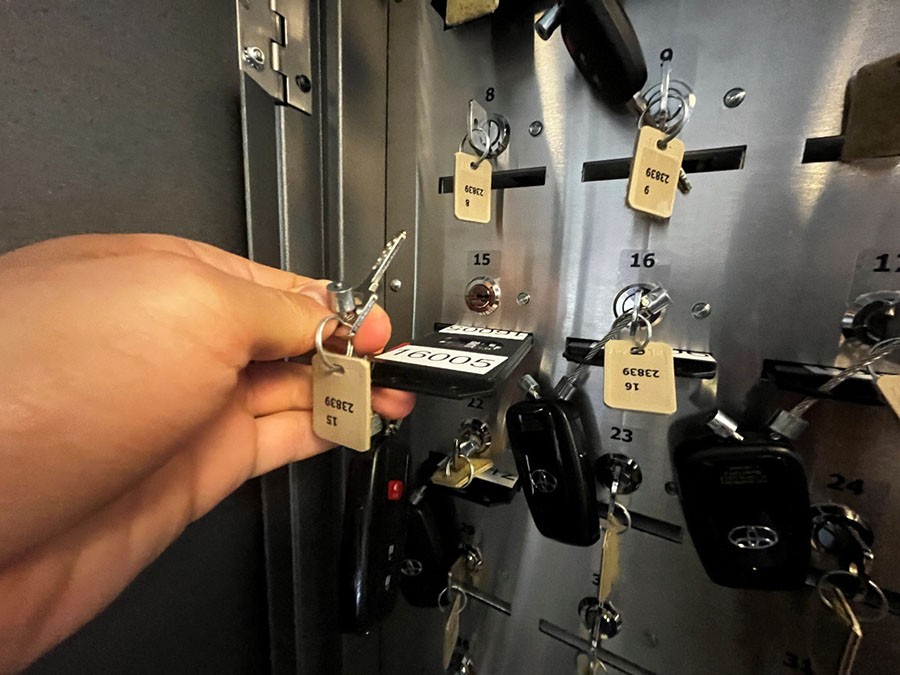
Turn the key and pull the card out of the slot.

Step 15
Close the door, and you’re all set!
Brief instructions
Open the key manager door, find the numbered keyslot (green light near it), slide the card in first. The card needs to be all the way in for the software to register this as a return. After the key card is in the slot, insert the key and turn it until the light turns off. Be sure the key card is secure before closing the door. Close the key manager door.
Complete instructions for returning your rental and key
Step 1
Start by logging in to the keybox.
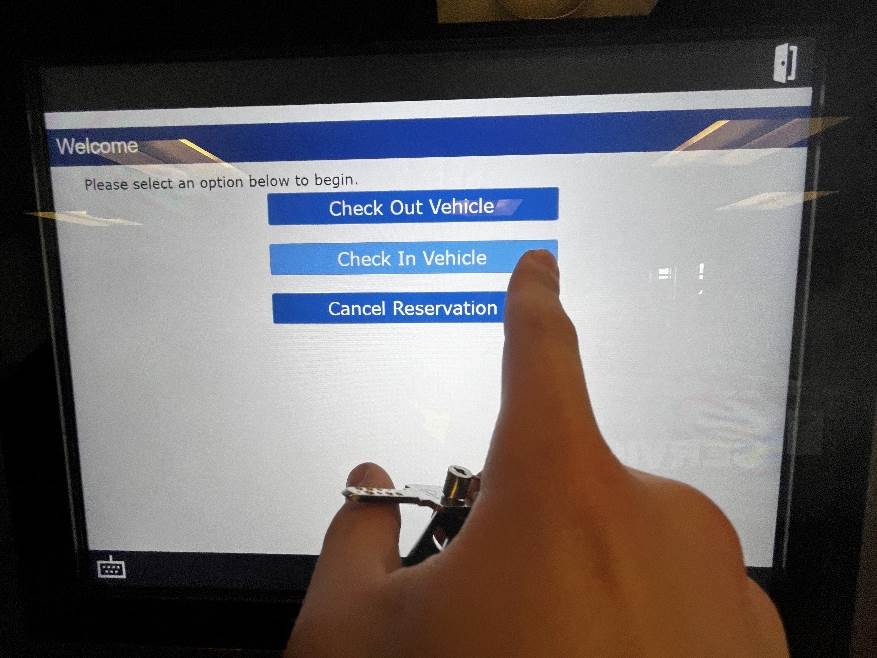

Step 2
Select Check In Vehicle.
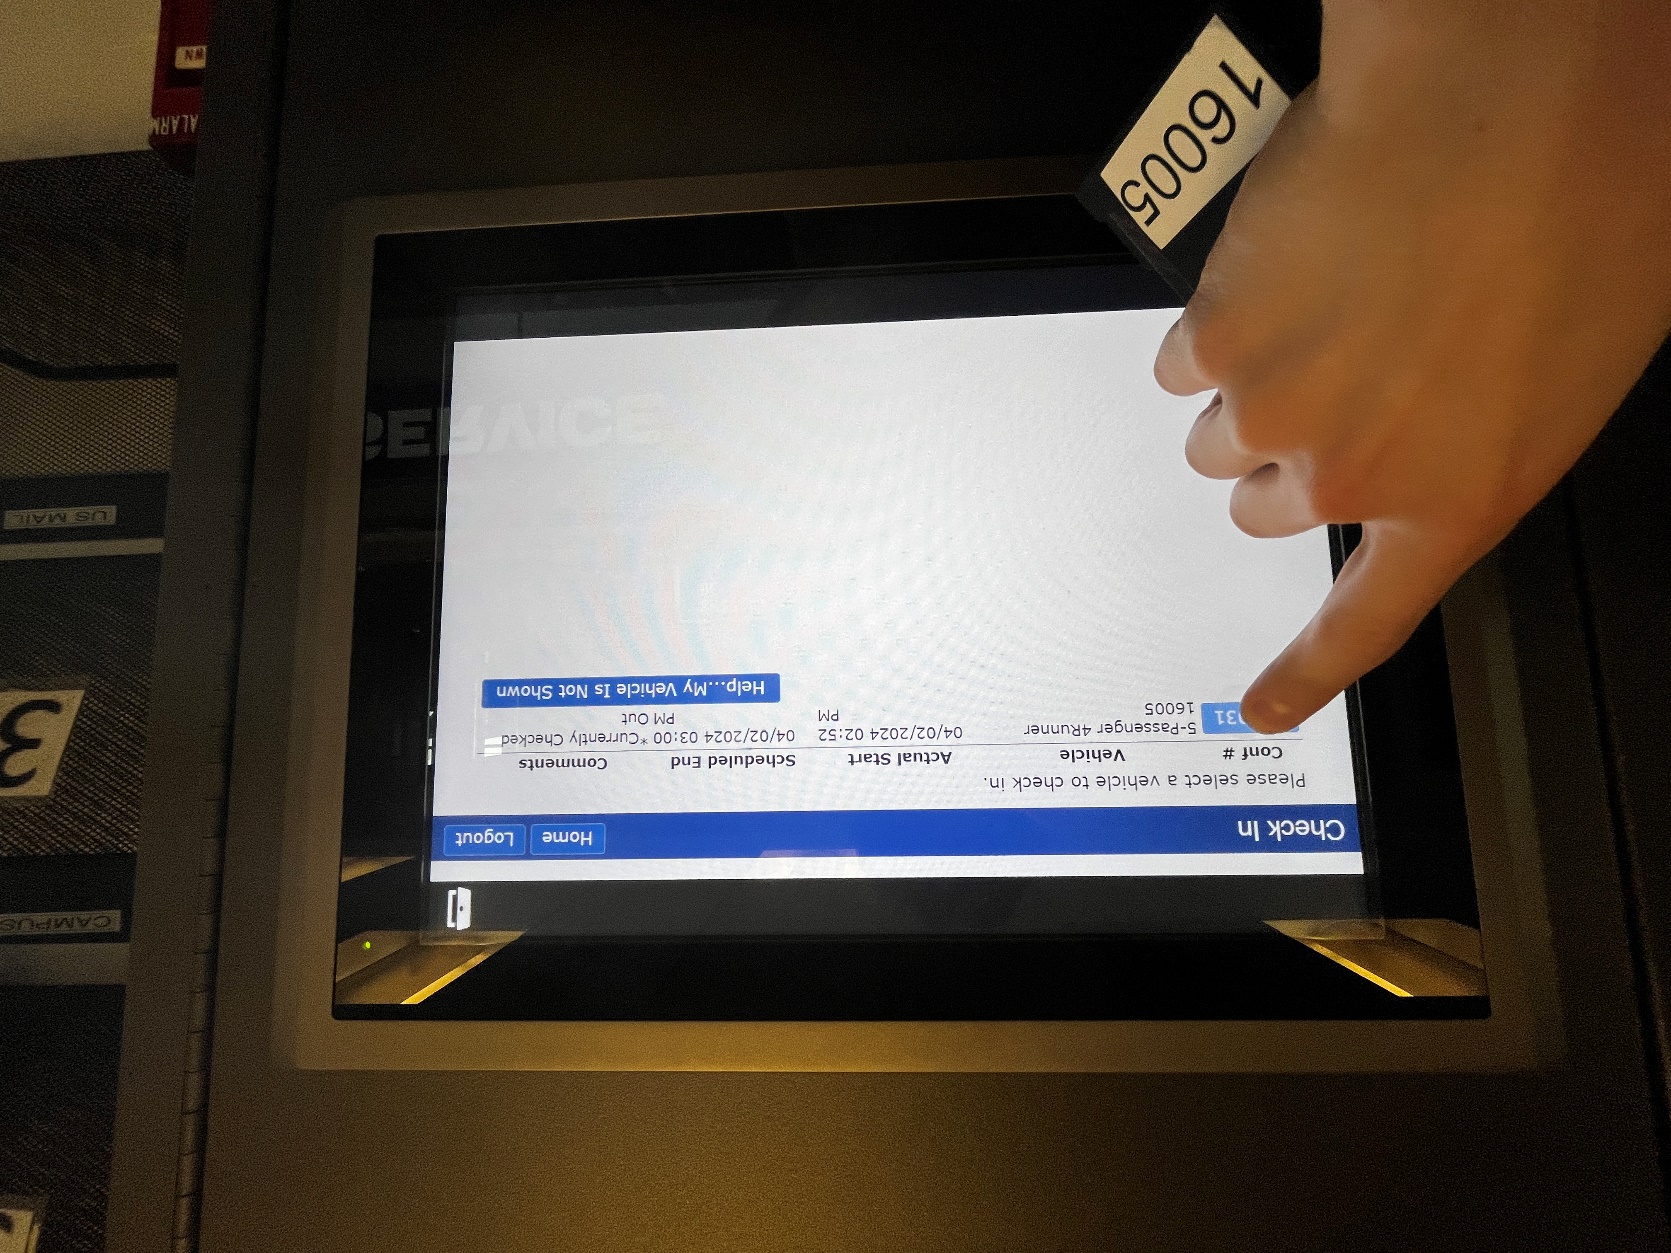
Step 3
Next, select the vehicle you want to check in.
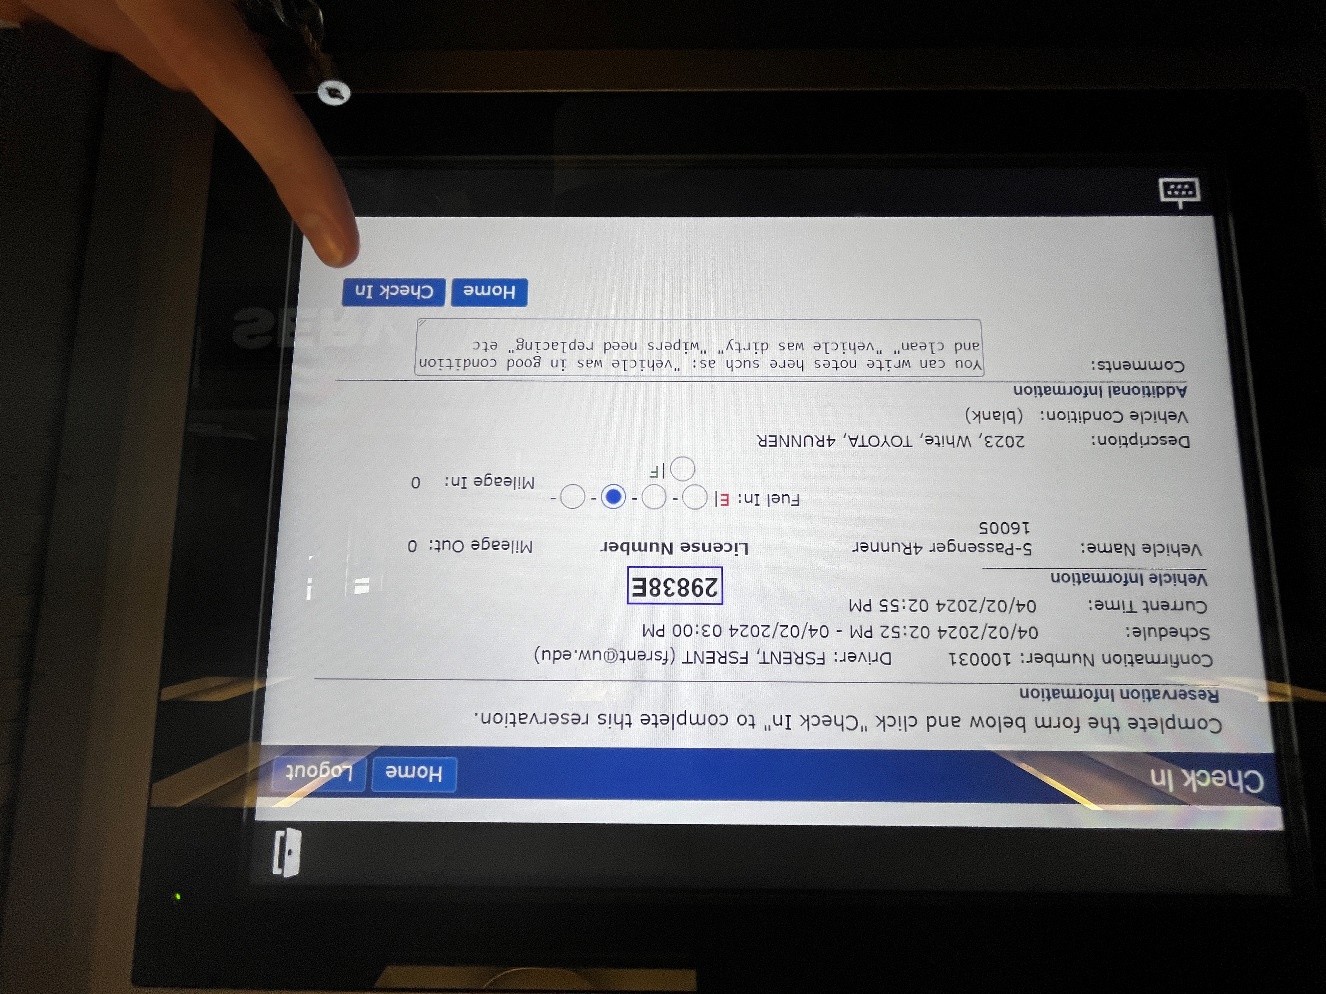
Step 4
On this screen, select the level of fuel in the tank and add any comments about the vehicle such as cleanliness or any issues you encountered with the vehicle. Then tap the Check In button.
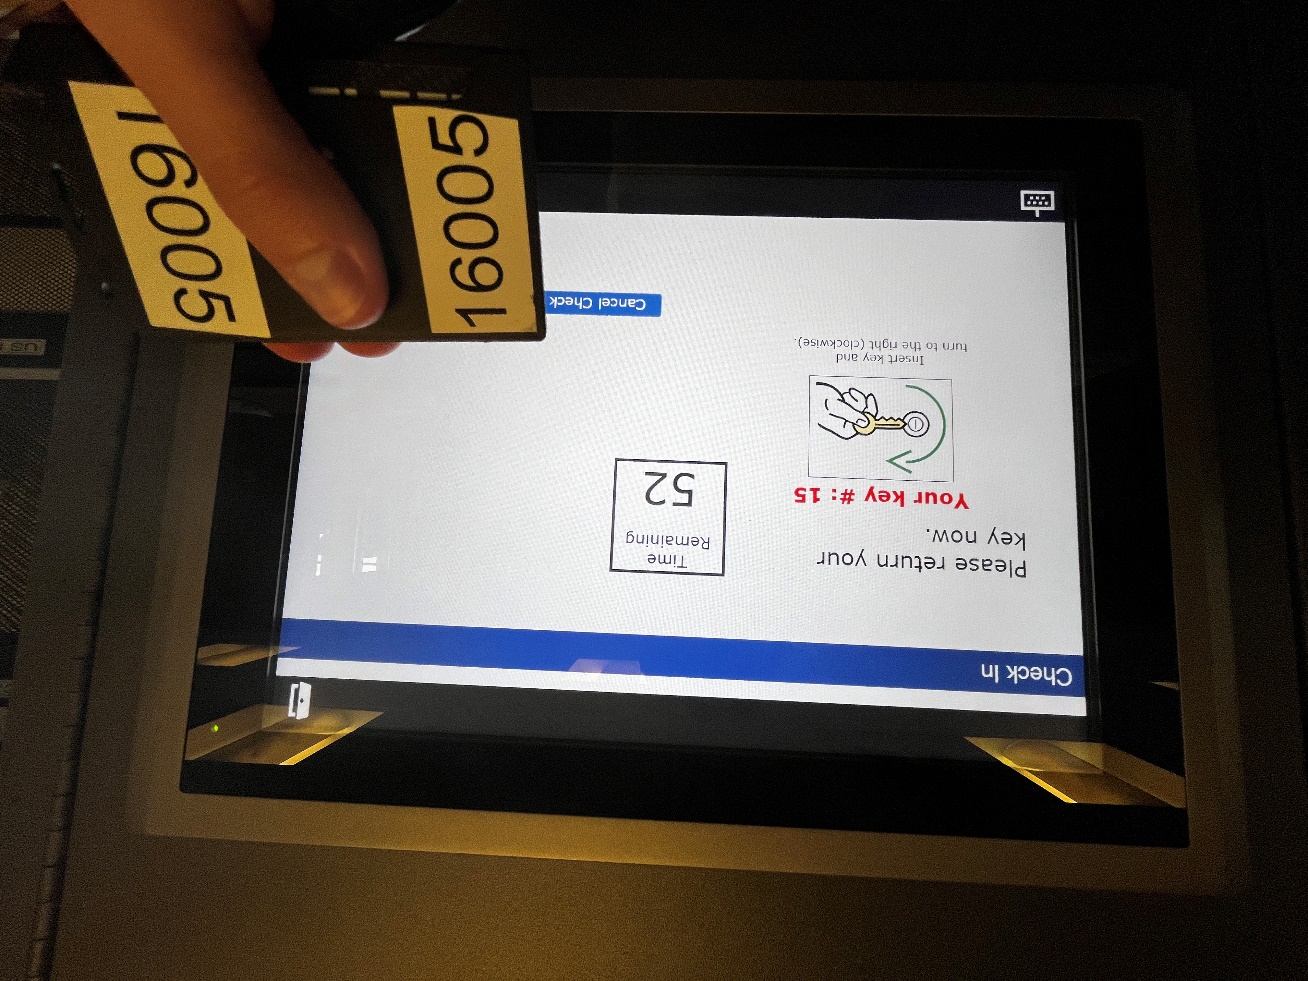
Step 5
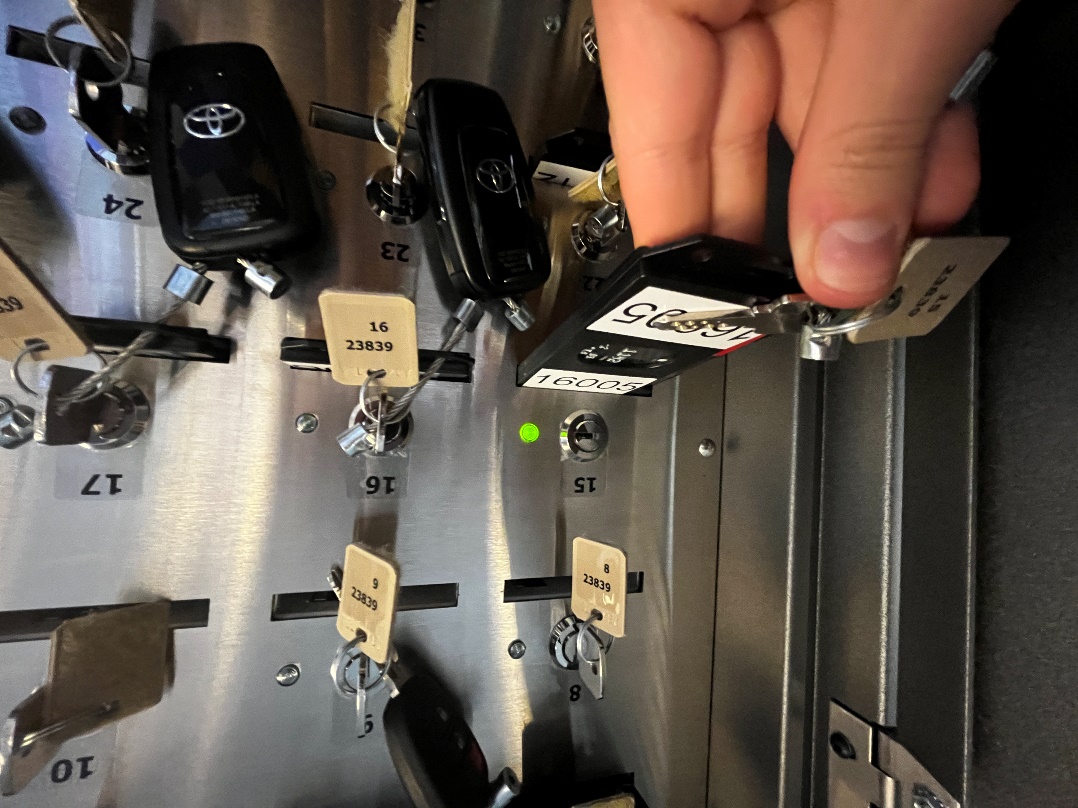
Once you see this screen, open the key manager door, and locate the numbered keyslot and glowing green light to return your vehicle.
Step 6
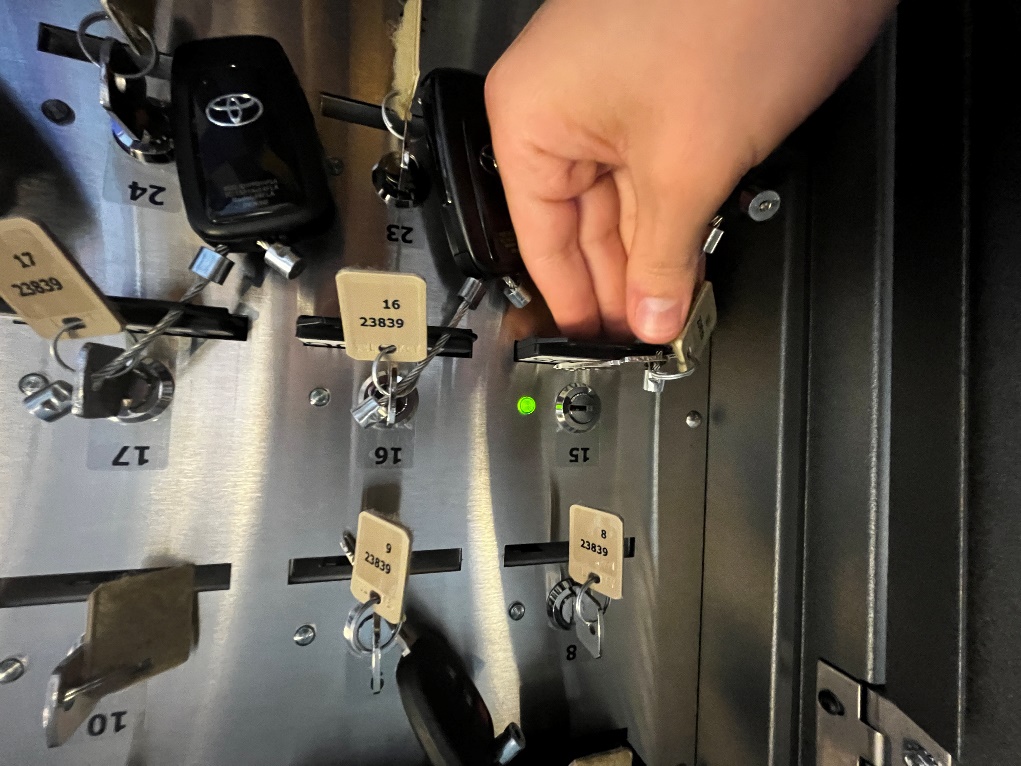
Once you've located the numbered keyslot, insert the card first. This is important as the key will not register as returned properly if the card is not inserted.

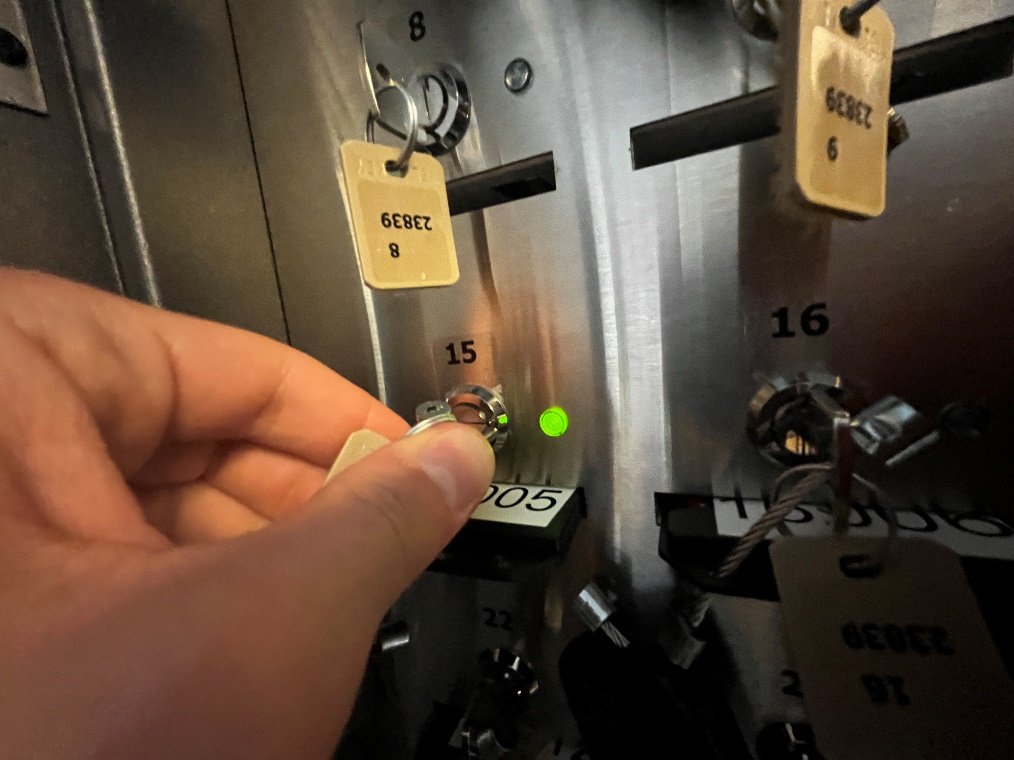
Step 7
Once the card is inserted, insert the key and turn it until the light turns off and the key is locked in the slot.
Step 8
Close the door and you're good to go!
| UCAR location | Key manager location |
|---|---|
| E02 parking lot | Key manager is now located at the Fleet services building. Hours: M-F, 7 a.m. - 3:30 p.m. |
| UW Tower garage (W46, level 4E) | Key manager is in the same location. |
| Central Plaza Garage (level C01) | Key manager is in the same location. Hours: 5 a.m. - 11 p.m. More information on CPG hours. |
| N22 parking lot | Key manager is now located inside the HUB near the east entrance. Hours: View the HUB hours. |
| South Campus Center | Key manager is now located inside the South Campus Center. Hours: View the South Campus Center hours. |
Canceling your rental
Step 1
To cancel your rental, simply go to “My schedule”, locate the rental you wish to cancel, and hit the red “X” button next to it.

Step 2
You should next see a confirmation notice:
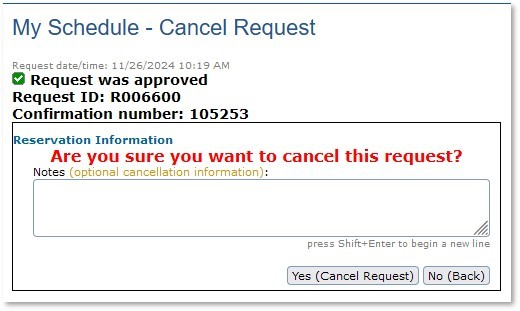
Step 3
Select "Yes (Cancel Request)". Your reservation will now read as:
If you are within 1 hour of your reservation start time, you will need to reach out to fsrent@uw.edu to end your reservation.