The Transportation Services online customer portal is used to reserve and purchase most parking products, as well as manage account and vehicle information. The step-by-step instructions below will guide you through this process.
Pay-per-use-parking (PPUP) customers can now sign up for PPUP in the customer portal and can track their PPUP usage for the current pay period online.
Getting started
Step 1
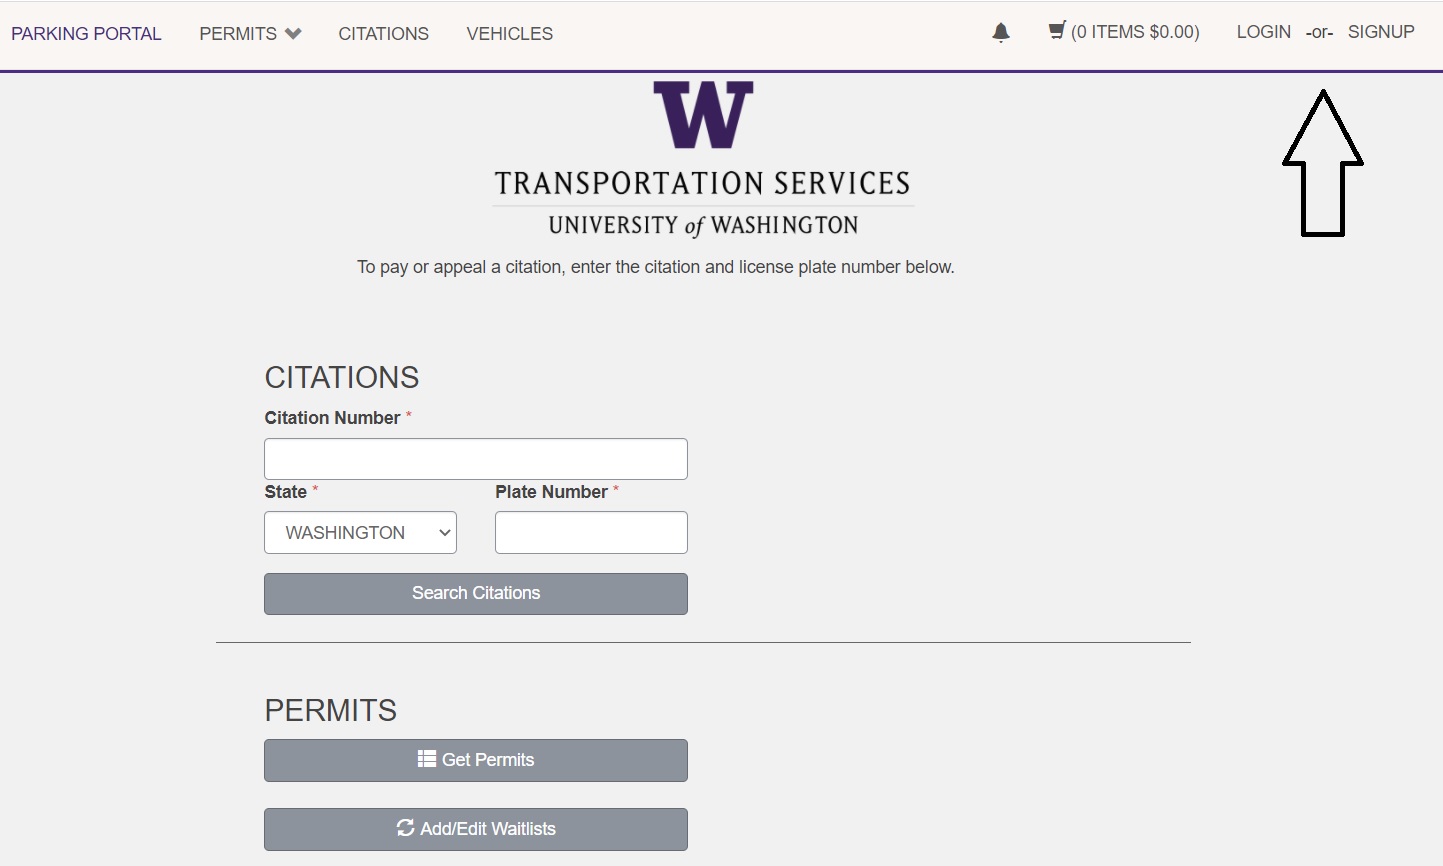
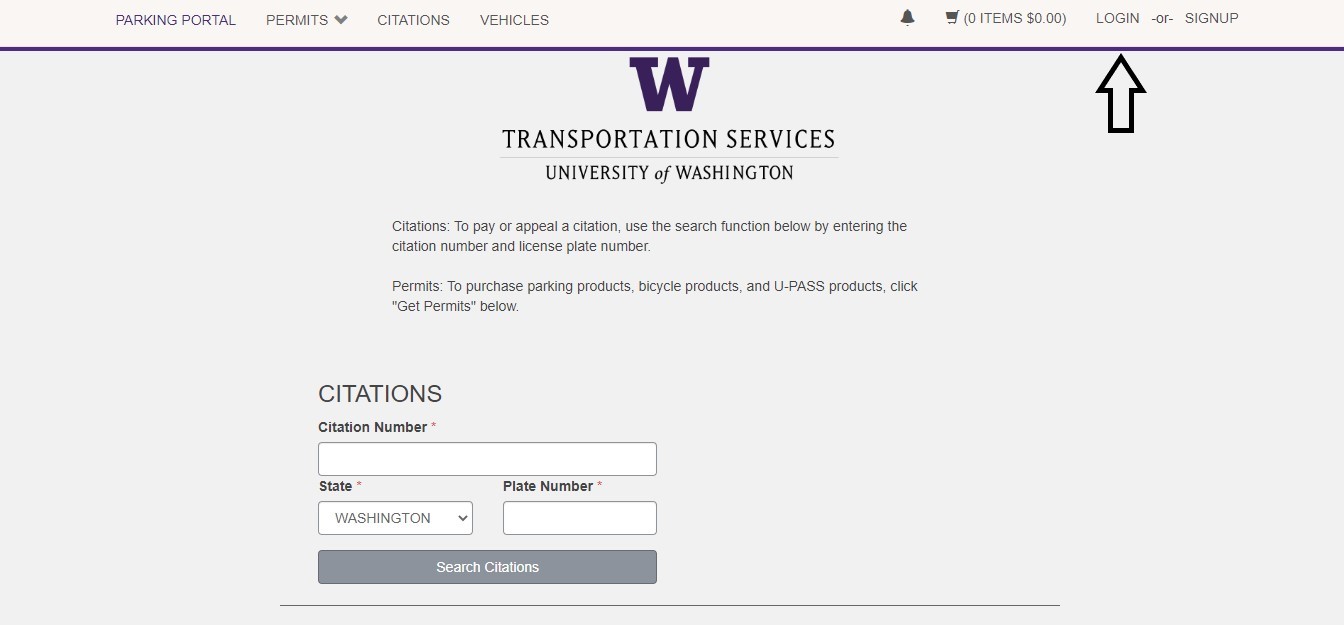
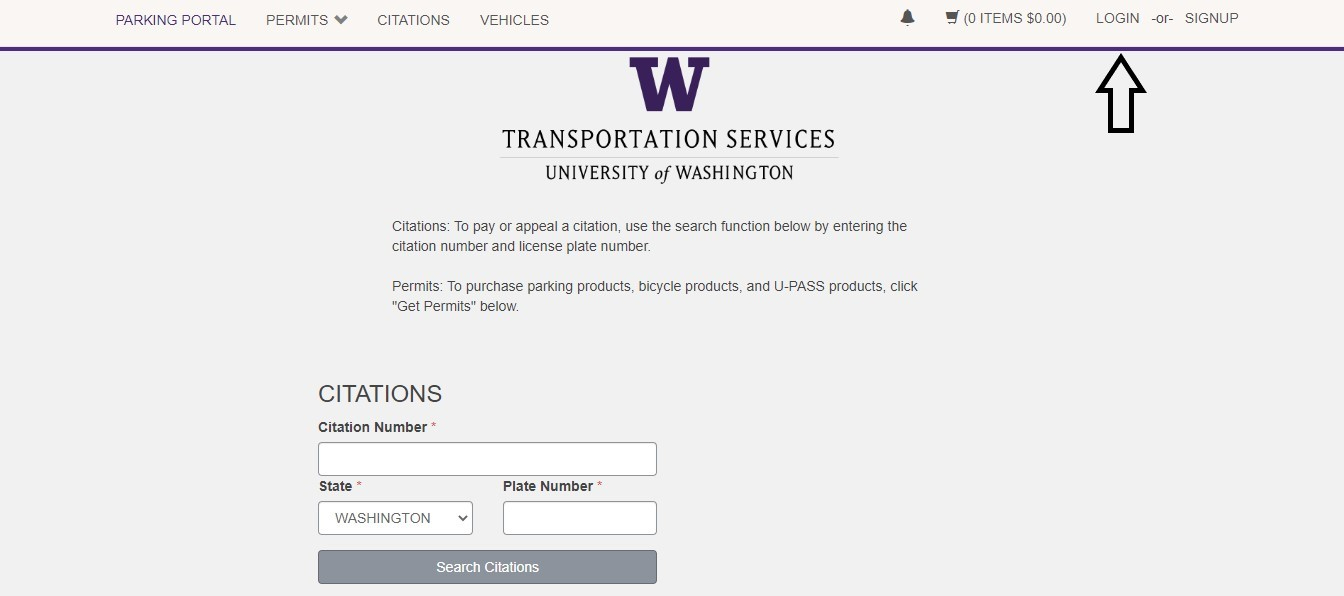
Log into the customer portal to view your account information or to get a Transportation Services product.
Step 2
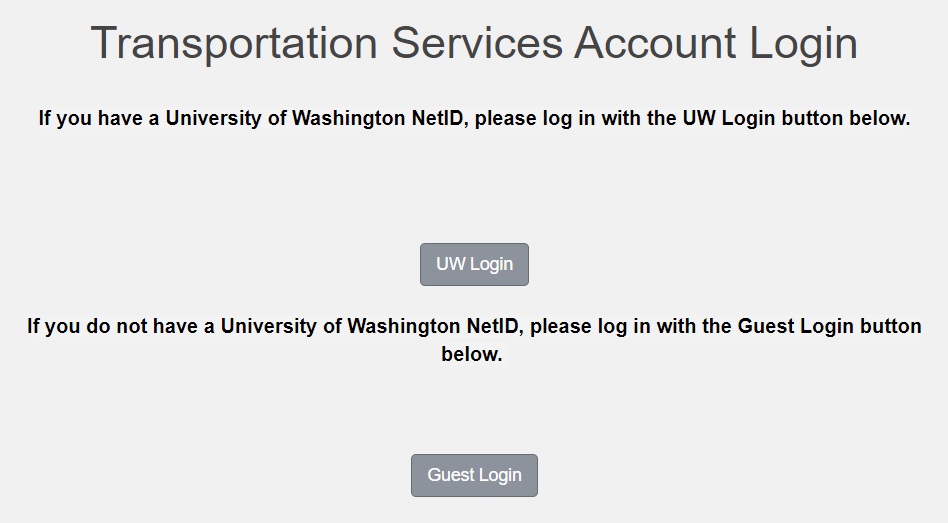
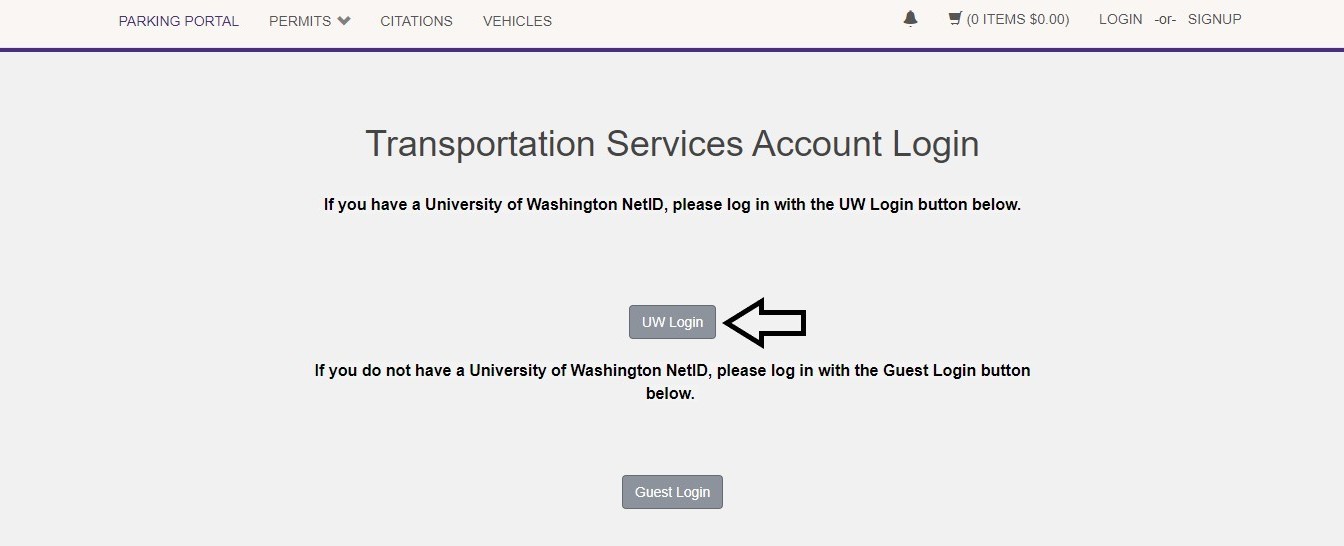
If you are affiliated with the UW and have a UW NetID, you will use the UW Login with your NetID information. If you are not UW-affiliated or do not have a UW NetID, you will use the Guest Login.
Step 3
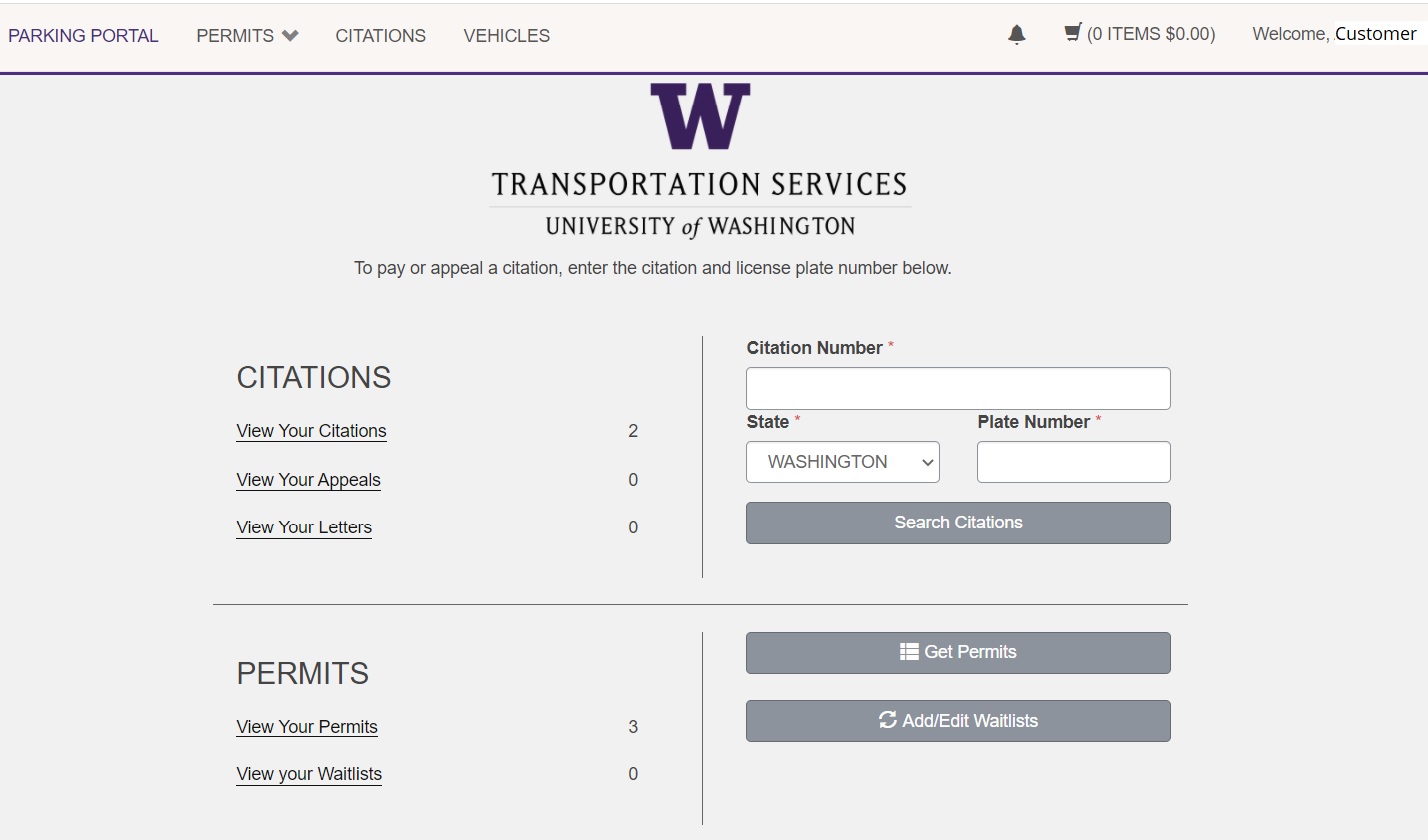
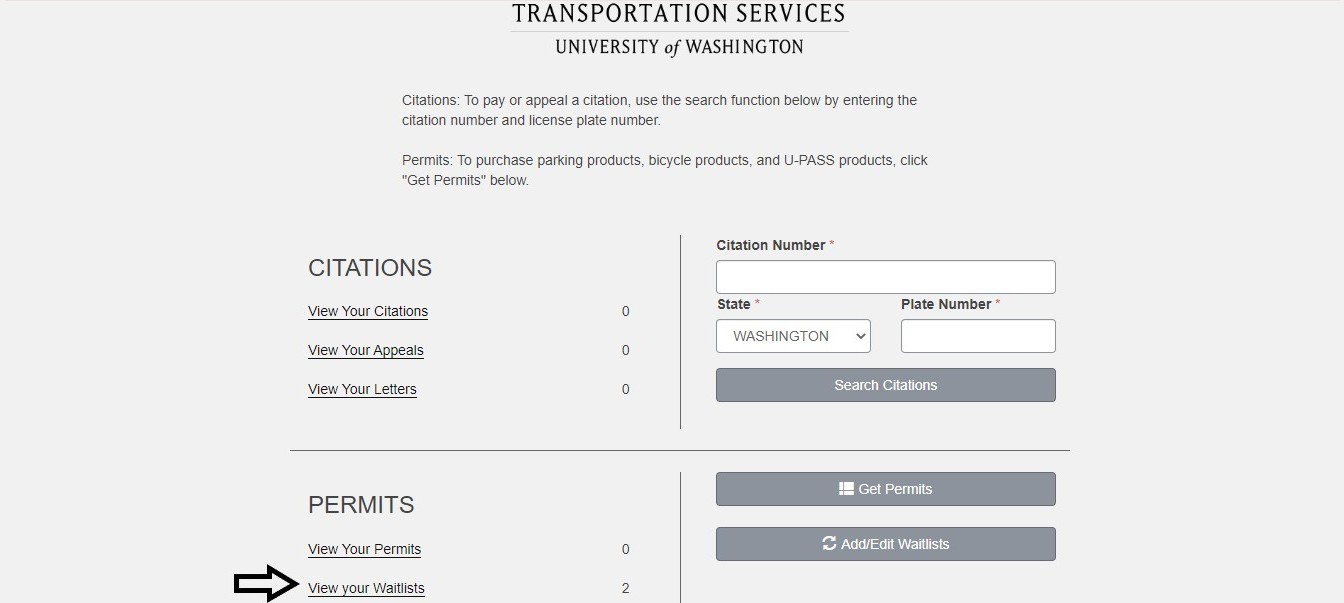
Once you have logged in, you will be brought to your account dashboard where you can manage multiple things such as purchasing, reserving and renewing Transportation Services products, viewing, appealing and paying for your citations and changing or adding vehicles.
Purchasing or reserving a product
Step 1
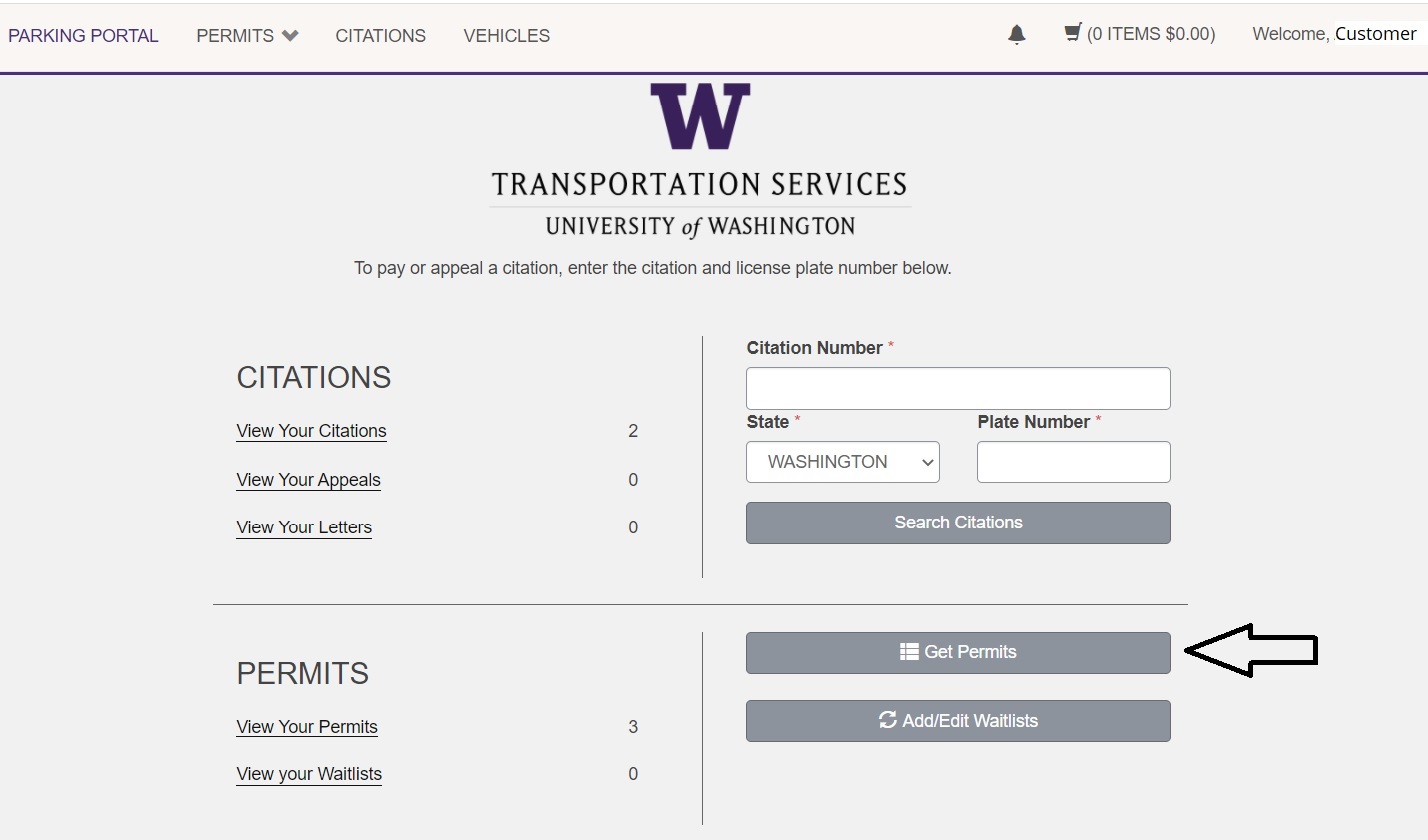
To purchase or reserve a product, click Get Permits.
Step 2
You will see a list of the products that you are eligible to purchase or reserve. This list will vary based on UW affiliation, employee subclassification and/or department/unit approvals. Please review all product information before purchasing or reserving a product so that you can determine the one that best fits your needs.
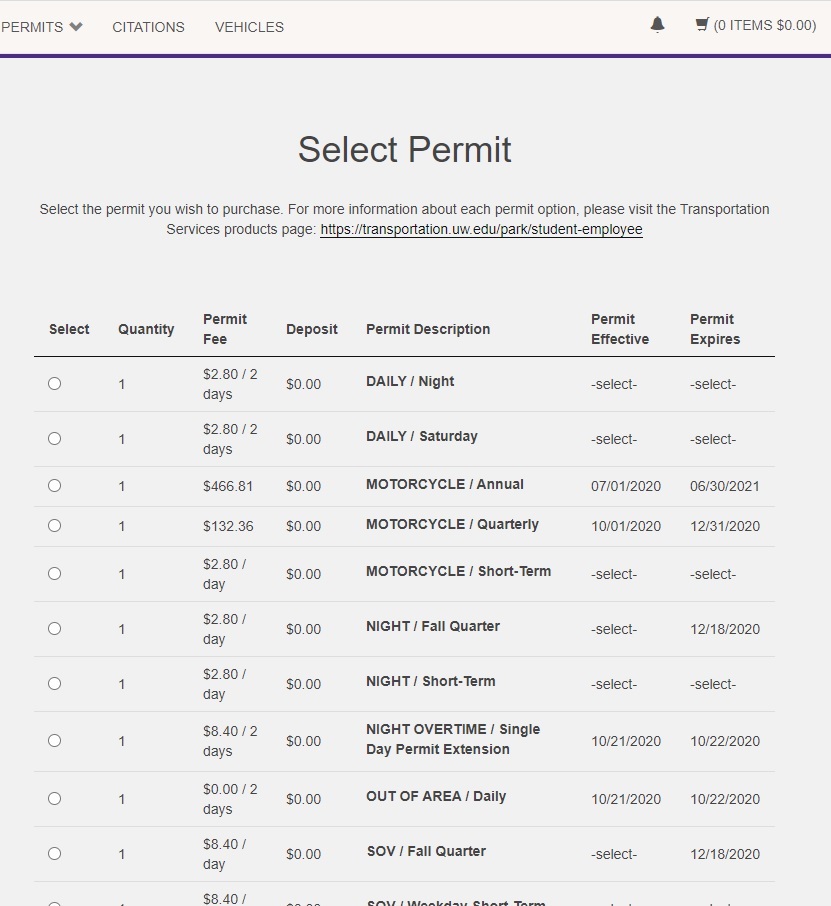
Step 3
Products eligible for renewal will appear at the bottom of the product list. You will be able to renew on a quarterly or annual basis, depending on the product type.

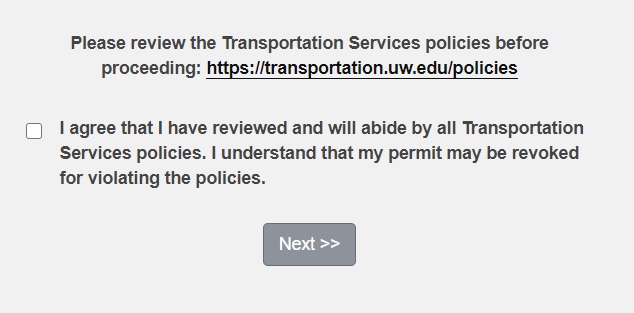
Step 4
After selecting your product(s), you must acknowledge that you have reviewed and will abide by Transportation Services policies and that any violation of these policies may result in a cancellation or revocation.
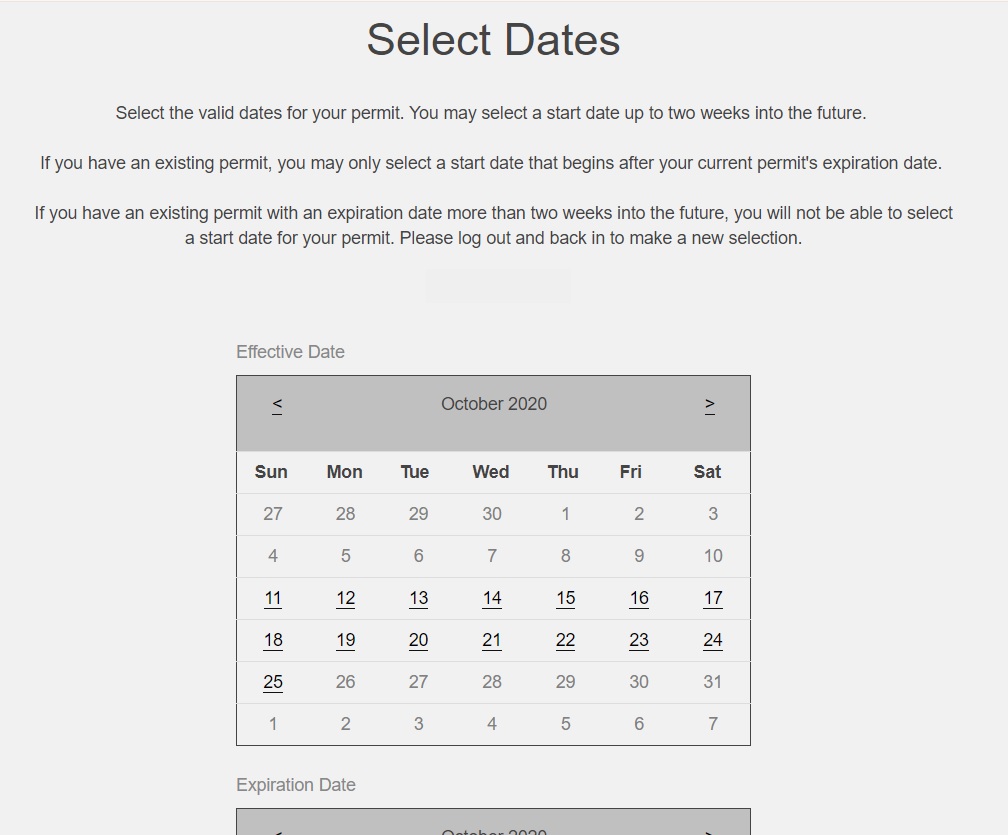
Step 5
If you selected a product that requires a date selection (e.g., short term or Daily permits), you will be asked to select an effective date for the permit. If you selected an academic quarter based parking product, you only need to select the start date. End dates are automatically selected based on the UW’s academic calendar. You may select an effective date up to two weeks in the future.
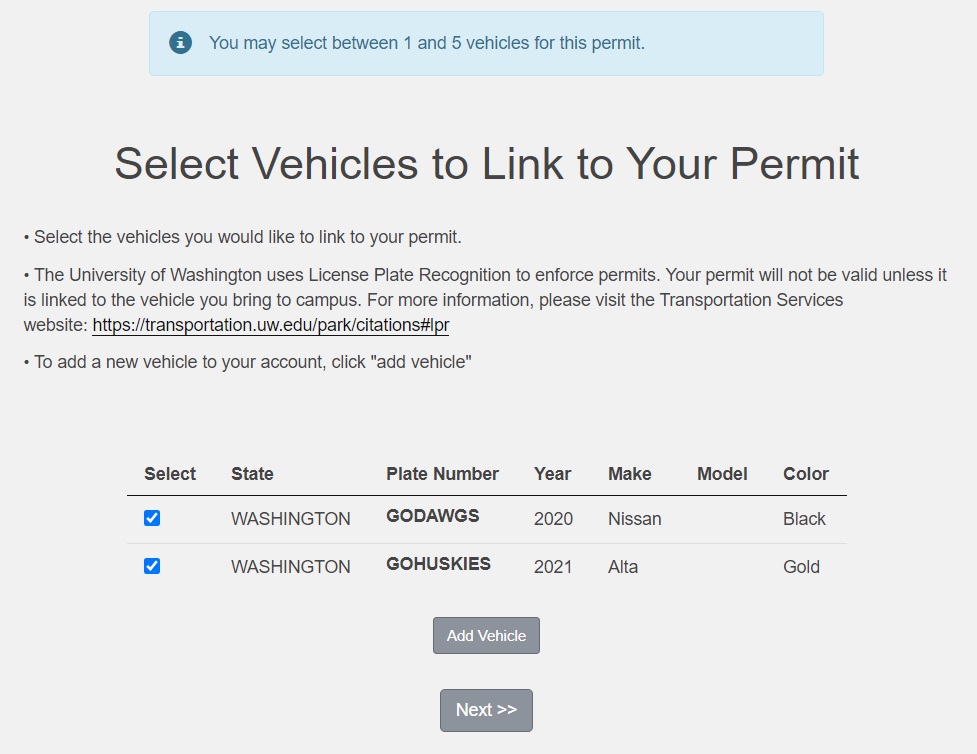
Step 6
Select which vehicle to add to this permit (if applicable). You may have up to five vehicles linked to your account and permit, but you may only park one vehicle on campus at a time. If the vehicle you would like linked to your permit is not listed or you need to add vehicle information, you can do so by clicking Add Vehicle.
Step 7
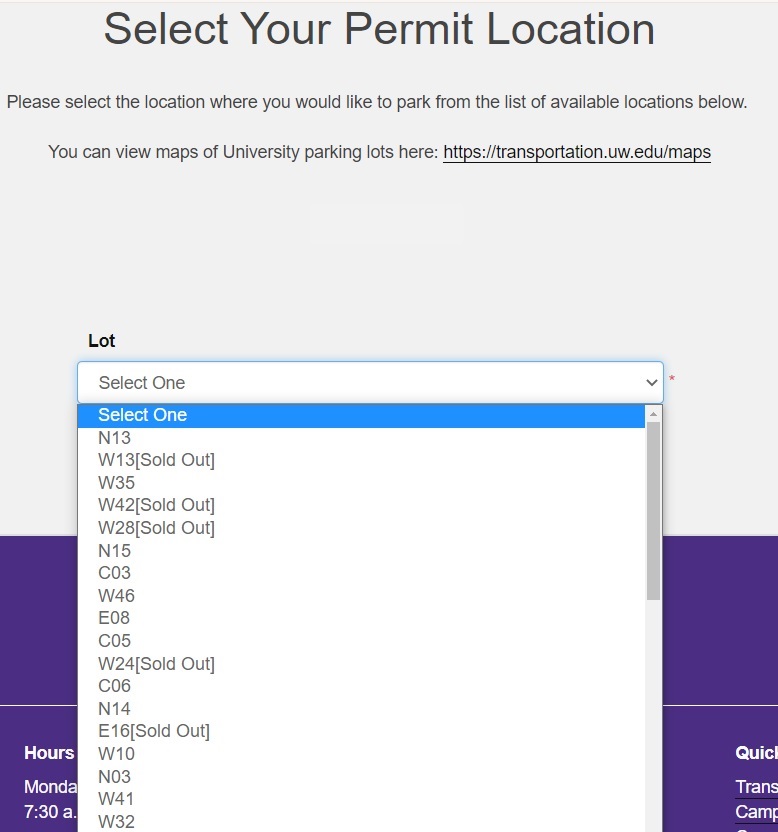
Select the location you would like your permit to be valid for (if applicable). Eligible lots vary by permit; only lots associated with your specific permit will be shown in the drop-down menu. Permits are subject to space availability at the time of purchase or reservation. If a location is not available, it will be listed as "[Sold Out]".
Step 8
Review the charges on your account and select the payment method you would like to pay with. Not all products or staff are eligible for payroll deduction, so you may not see it listed. Some products are only available for purchase with a credit card online.
Step 9
If you selected payroll deduction as your payment method, check the box to confirm that you understand and confirm the charges for your purchase before clicking Next to finalize.

Step 10
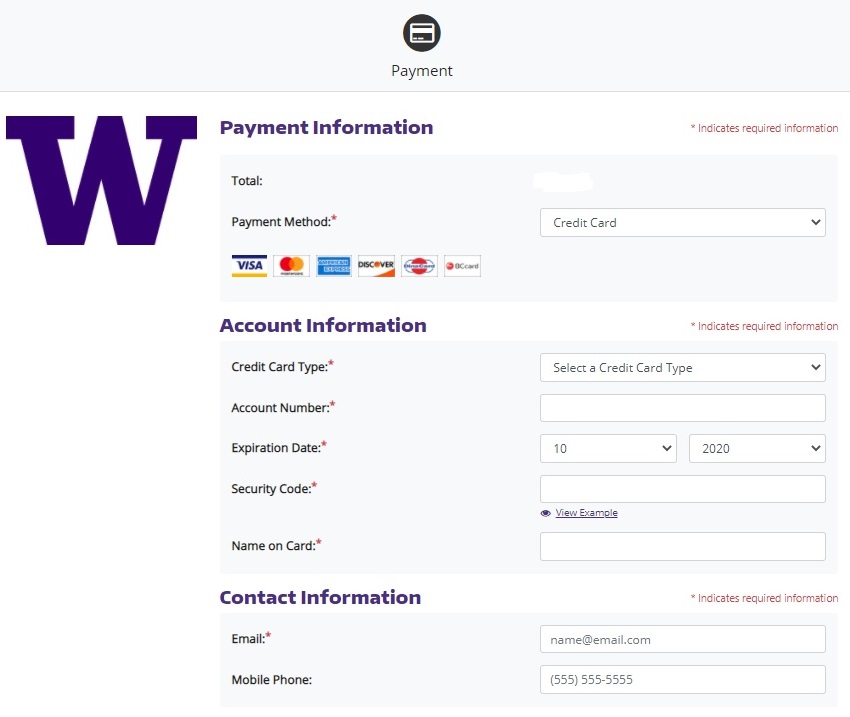
If you selected a credit card as your payment method, you will be redirected to a screen to enter your credit card details. After entering all required information, check the box to confirm you have reviewed the applicable return policy information, before clicking Continue to finalize.
Step 11
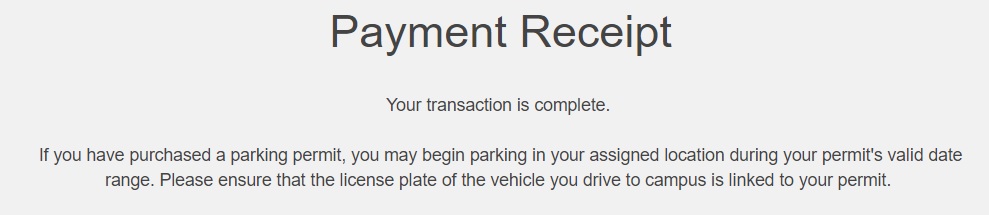
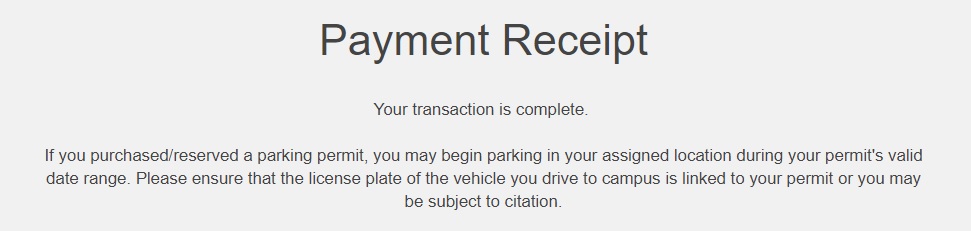
Your purchase/reservation is now complete. You will receive an email confirmation of the transaction as well.
Adding waitlists
Step 1
Log into the customer portal to view your account information.
Step 2
To access your full account, please log in with your UW NetID.

Step 3
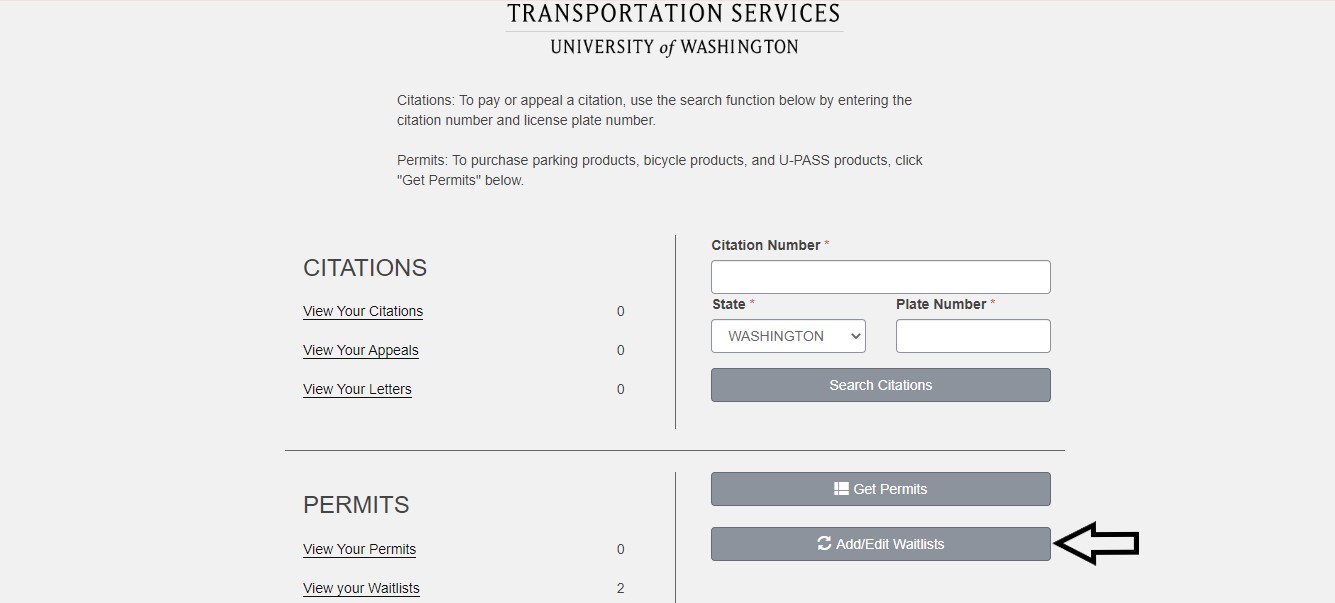
Once logged in, you will be taken to your account dashboard.
To add a new waitlist to your account, click Add/Edit Waitlists.
Step 4
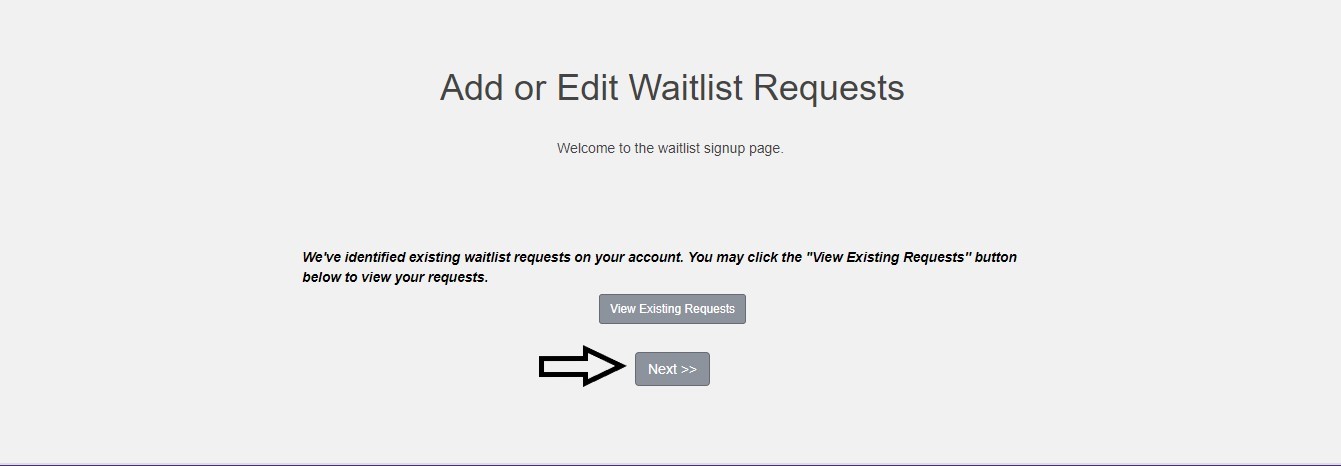
Click Next.
Step 5
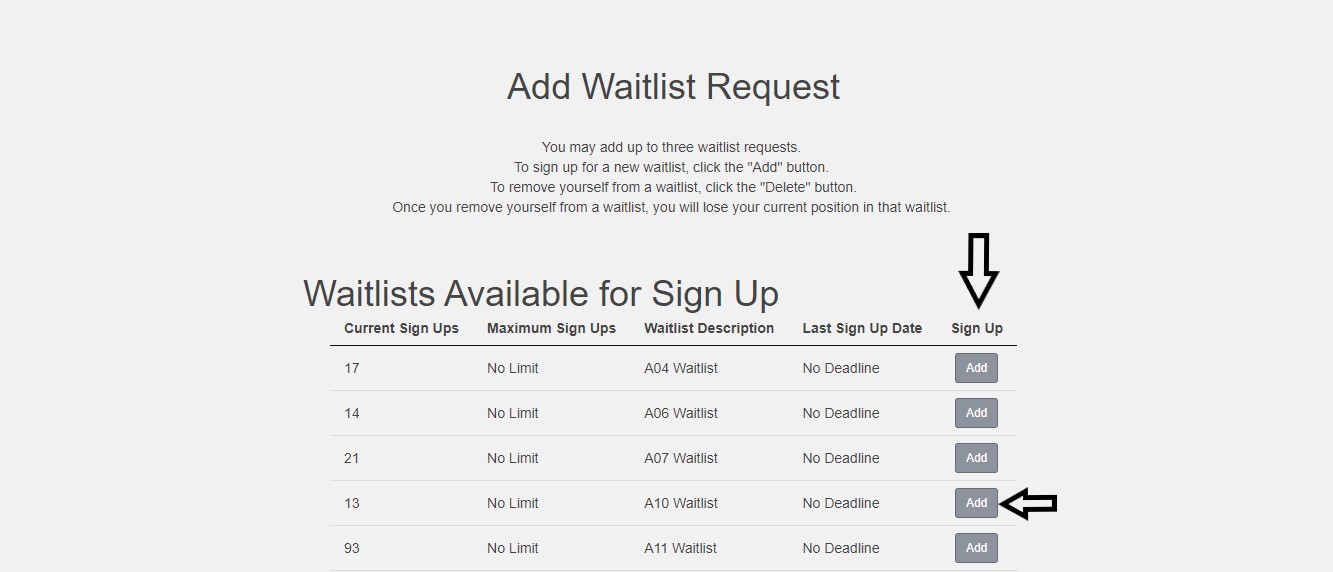
Under the “Waitlists Available for Sign Up” header, you will see every waitlist you’re able to sign up for. This doesn’t include the waitlist(s) you’ve already added.
To add a waitlist to your account, identify the desired location from the “Waitlist Description” column. Then click Add.
Maps of all campus lot locations can be found online.
Step 6
You may only have three active waitlists at any given time. When you add a third waitlist to your account, you will be taken to a summary of your active waitlists. Click Done to finish.
Ranking waitlist priority
Step 1
Log into the customer portal to view your account information.
Step 2
To access your full account, please log in with your UW NetID.
Step 3
Once logged in, you will be taken to your account dashboard.
To edit the priority of your active waitlists, click Add/Edit Waitlists.
Step 4
Click Next.
Step 5
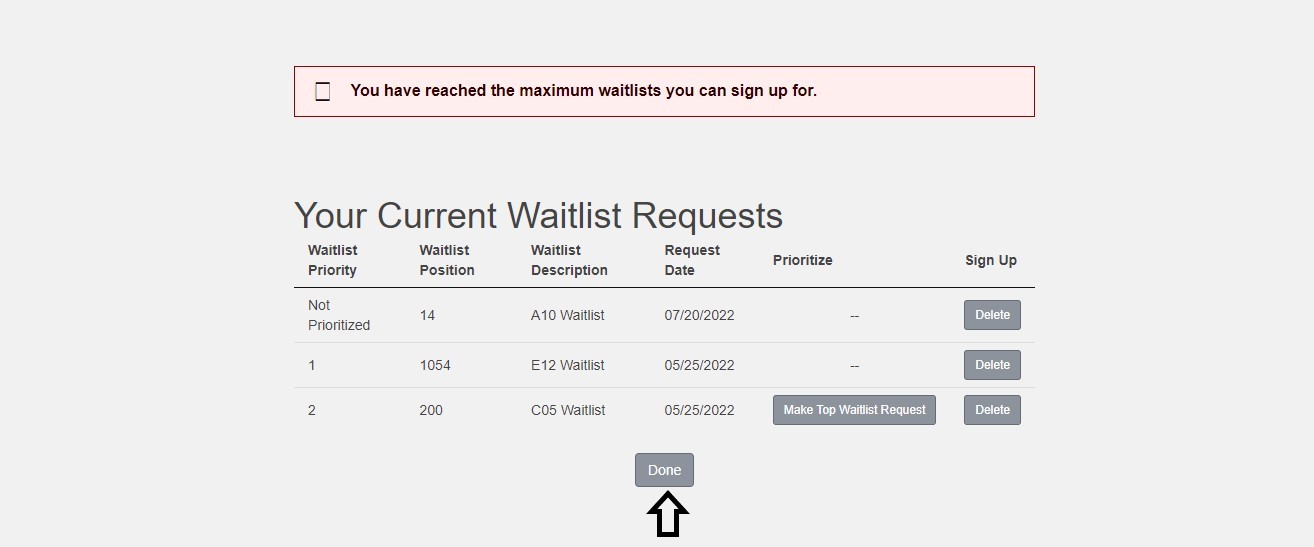
Scroll to the bottom of the “Waitlist Request” page. Your active waitlists are listed underneath the “Your Current Waitlist Requests” header.
You can alter your waitlist priority rankings by clicking Make Top Waitlist Request. When you are satisfied with the order of your waitlist requests, click Done.
Please note that upon receiving a waitlist offer, any lower priority waitlists will automatically be removed from your account.
Waitlists for bike products are not prioritized, so they are not impacted by parking lot waitlist rankings. If you receive a waitlist offer for a vehicle lot, you will not be removed from any bike product waitlists.
Step 6
You can view your waitlist prioritization any time by clicking View your Waitlists or Add/Edit Waitlists from your account dashboard.
Please note, however, that you will only be able to edit the priority of your waitlists from the Add/Edit Waitlists page.
Accepting a waitlist offer for an Annual SOV Permit
Step 1
Log into the customer portal to view your account information.
Please note: These instructions are for customers who do not have a currently active permit and wish to purchase an annual SOV (Single Occupancy Vehicle) Permit into their offered lot.
Step 2
To access your full account, please log in with your UW NetID.
Step 3
Navigate to your list of waitlists by clicking View your Waitlists from your account dashboard.
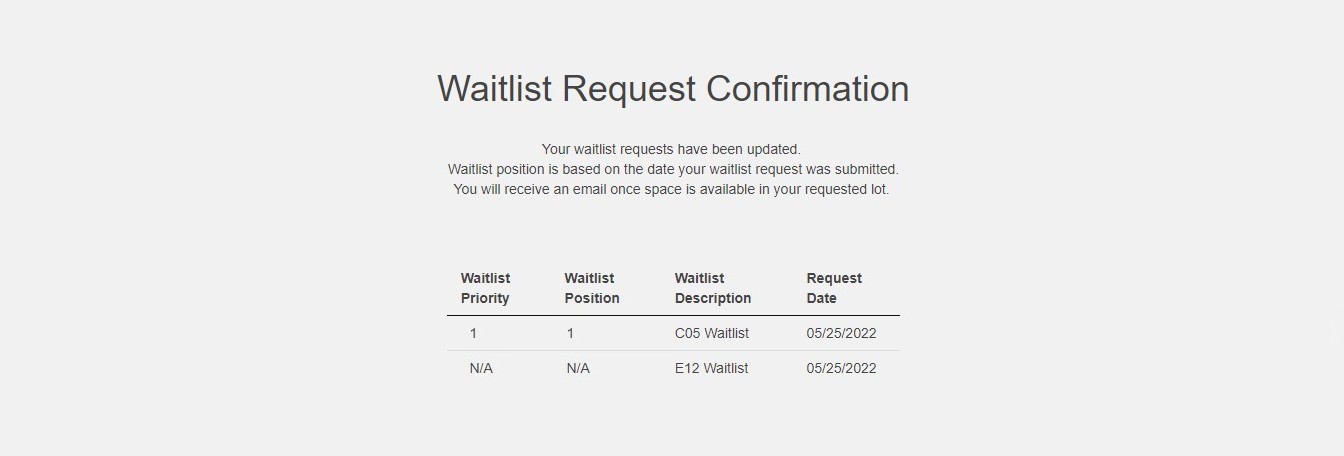
Step 4
In your list of active waitlists, a waitlist position listed as “N/A” means you have an active offer for that waitlist.
Step 5
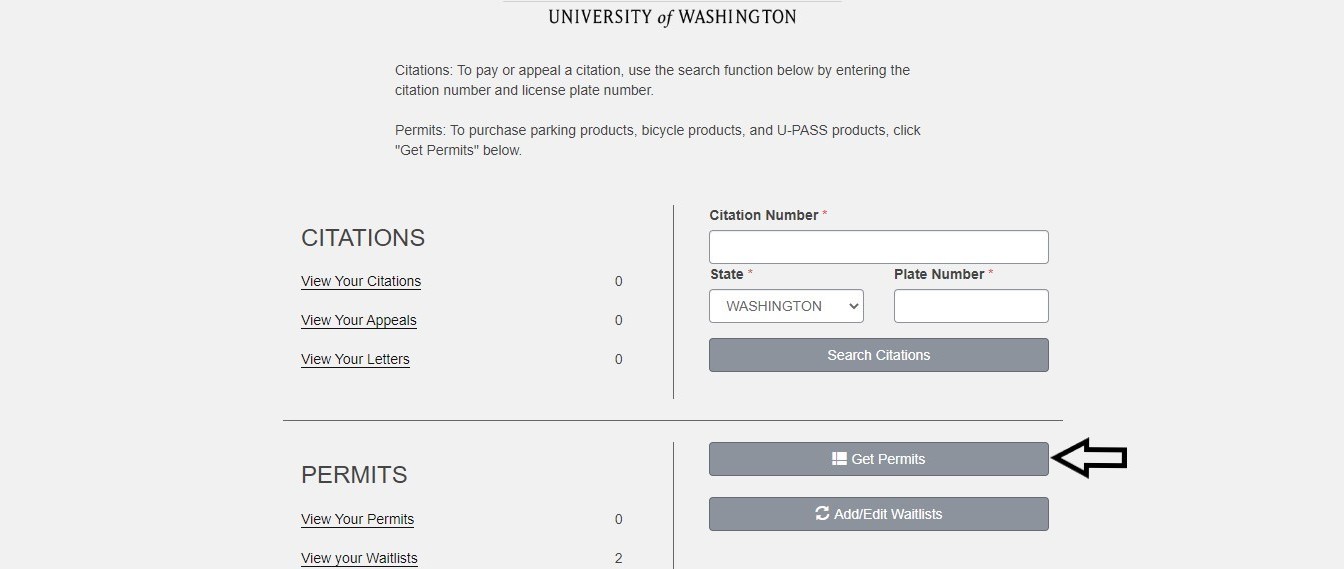
To purchase a fulltime SOV permit in your waitlisted lot, return to your account dashboard and click Get Permits.
Step 6
To proceed with the permit purchasing process, click Next.

Step 7
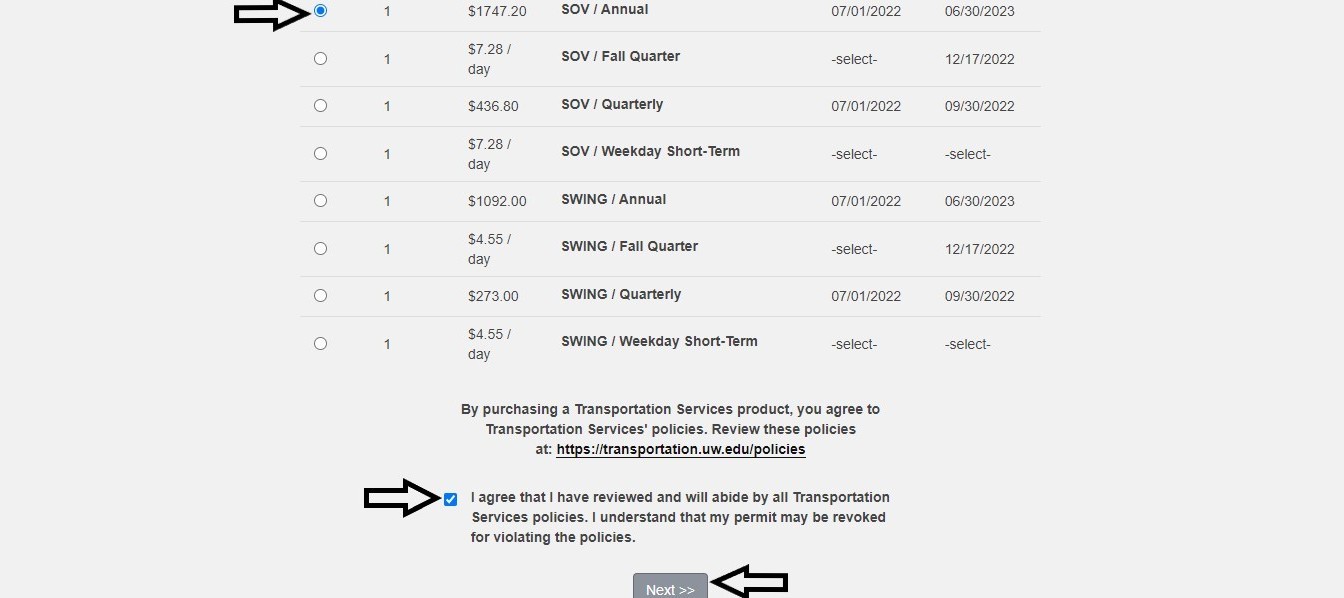
From the “Select Permit” screen, select the SOV / Annual option. Then check the box at the bottom of the page to agree to the relevant Transportation Services policies. Click Next to proceed.
If the Annual permit option is not listed, you may select the SOV / Quarterly option instead.

Step 8
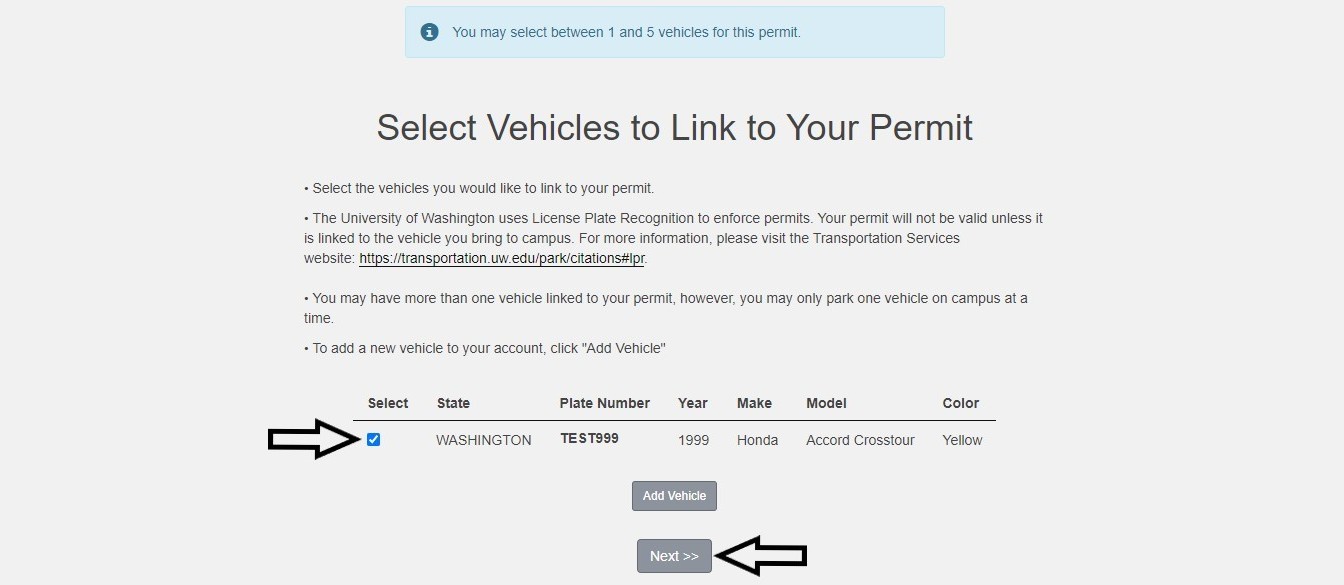
Select the vehicle you would like linked to your permit and click Next.
You may have up to five vehicles linked to your permit, but you may only park one vehicle on campus at a time.
If the vehicle you would like linked is not listed or you have not registered your vehicle yet, click Add Vehicle and follow the instructions.
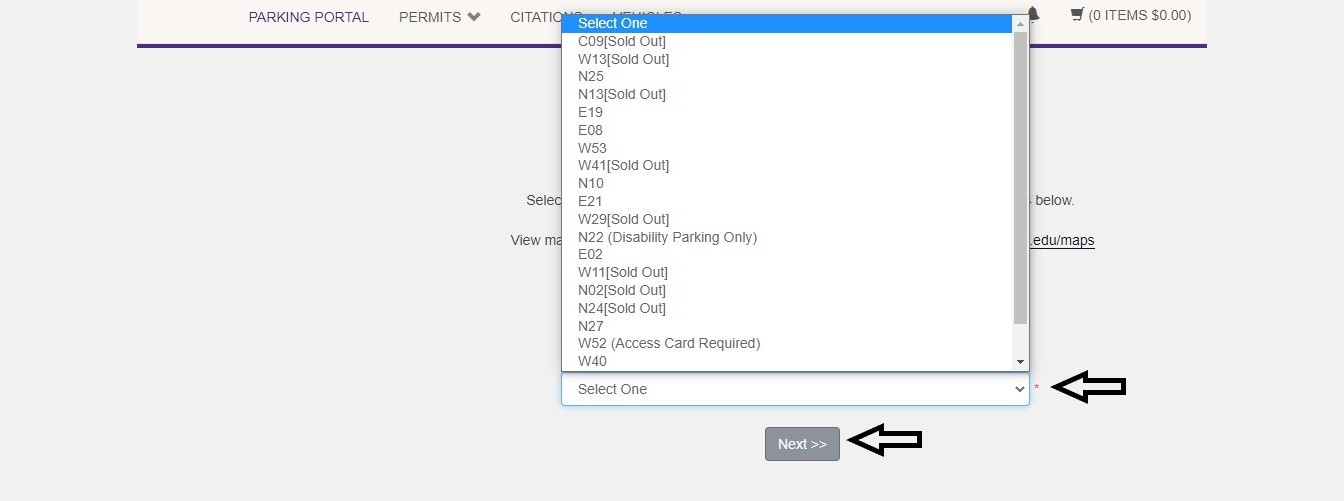
Step 9
On the “Select Your Permit Location” page, you will be able to select your offered waitlist lot from the dropdown menu.
Click Next to proceed.

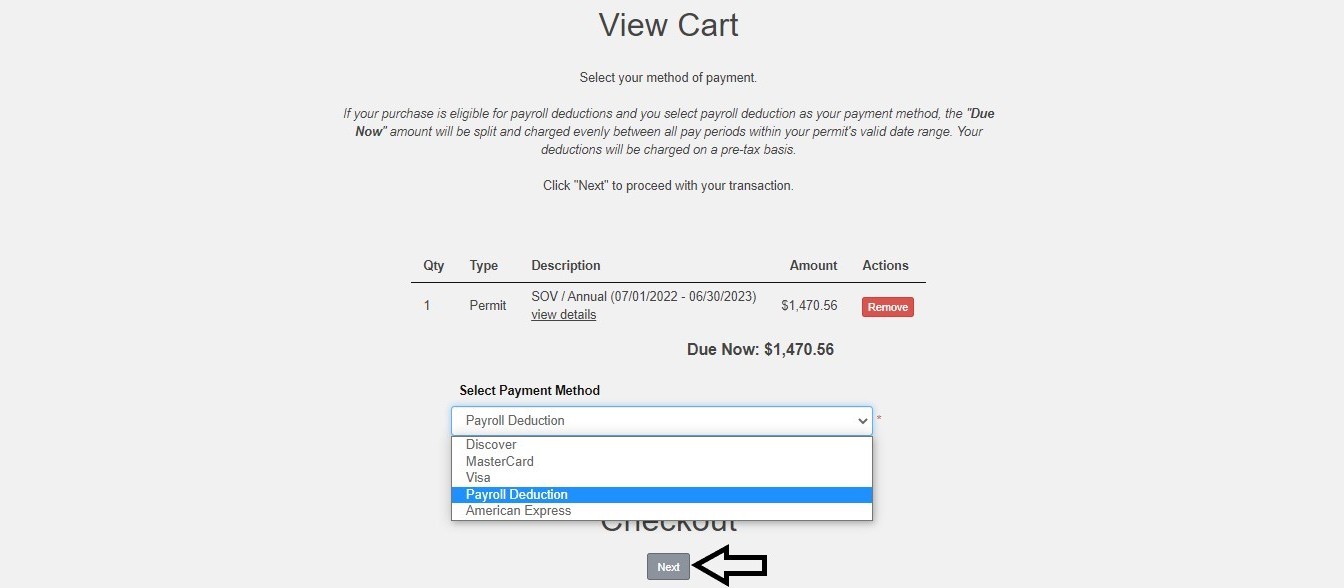
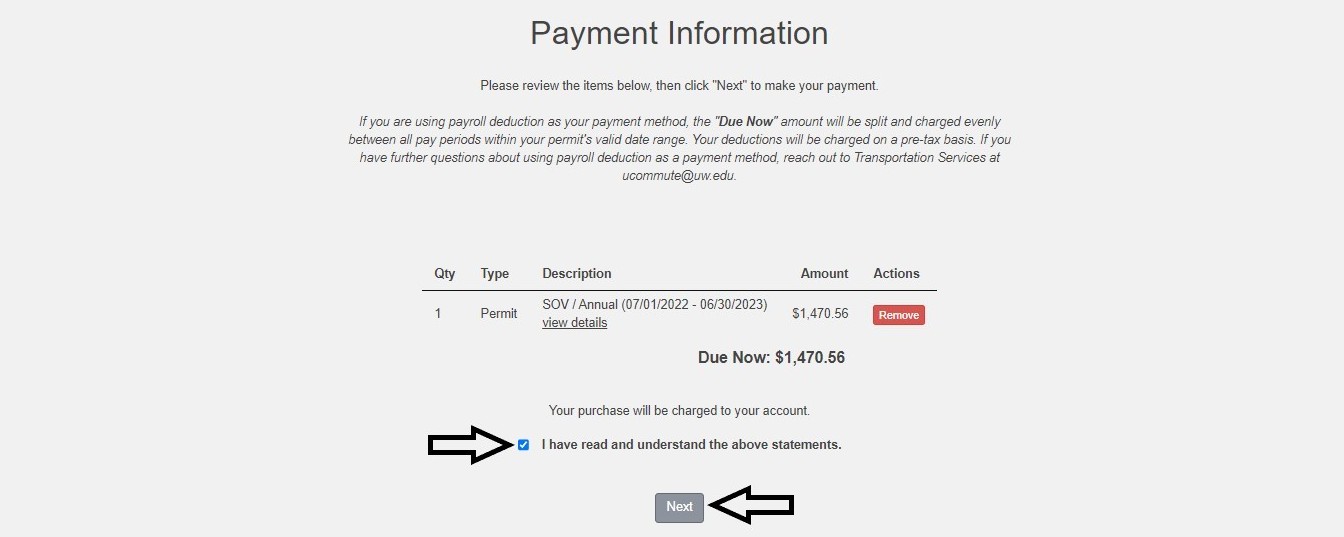
Step 10
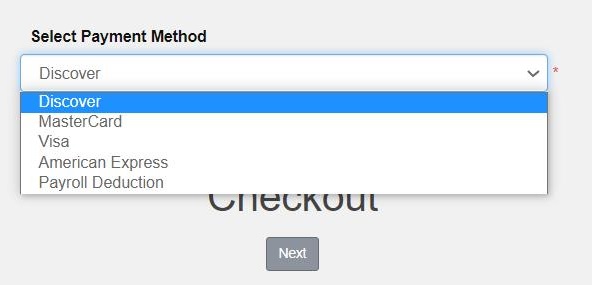
In the checkout screen, you can select your payment type, including Payroll Deductions from the Select Payment Method dropdown menu.
Please make your selection, check the box at the bottom of the page, and click Next.
Then finalize the permit purchasing process as directed.
Step 11
More information on purchasing an SOV permit may be found on the Transportation Services website.

Annual renewal is for customers to renew their annual transportation products, such as a parking permit, vanpool or bike locker. All annual transportation products expire on June 30 each year and must be renewed to maintain uninterrupted service.
Customers will have the opportunity every year during the month of June to renew their products for the following fiscal year. If you miss the renewal deadline, your current product or lot assignment may no longer be available and you may need to go on a waiting list.
Annual renewal (renewing a product)
Step 1
Log into your account on the online customer portal using the Login button.
Step 2
To access your full account, including the products eligible for renewal, click the UW Login option and enter your UW NetID information.
Step 3
Once you’ve logged into your account, you will be taken to your account dashboard. To begin the renewal process, click Get Permits.
Any outstanding citations will need to be paid before you can renew your annual products.
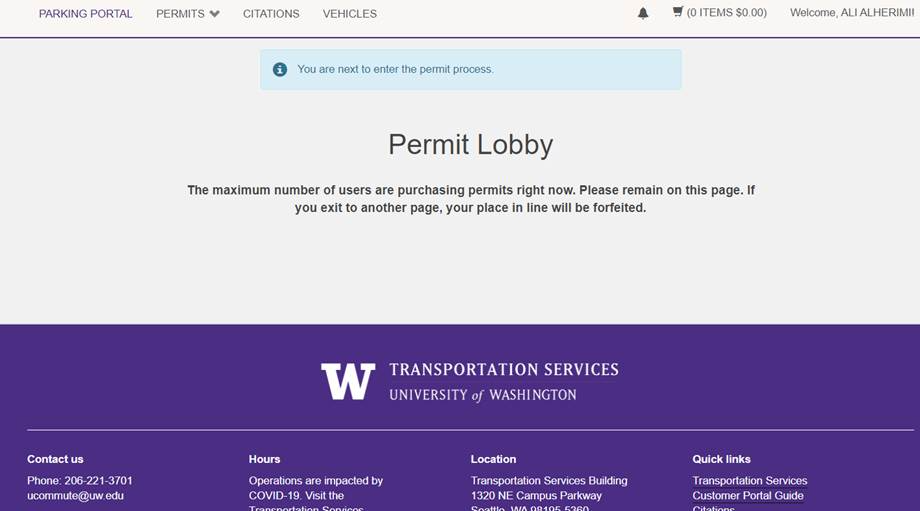
Step 4
To manage the high volume during this busy time, the customer portal may place you in a virtual “lobby” where you will wait until you can begin your renewal transaction. You can also decide to complete your renewal at a later time, but you will lose your spot in line.
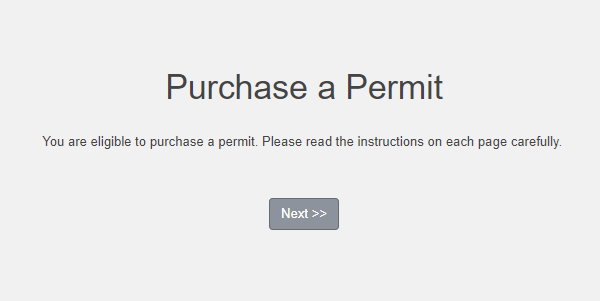
Step 5
After selecting Get Permits, you'll get to an intermediary screen where you'll click the Next>> button to step into the Select Permit screen.
Step 6
Once you make it to the Select Permit screen, you will see the permits that are eligible for annual renewal underneath a section labeled Renew Existing Permit at the top of the page.
Select the permit you would like to renew. If you have multiple permits to renew, please note that you may only complete one permit renewal at a time, as permits are renewed individually.
If there are permits that you do not wish to continue, you do not need to renew that product.
Permit rates may vary year to year. Please review the most updated information for your permit on our website.

Step 7
After selecting the permit you would like to renew, you must acknowledge that you have reviewed and will abide by Transportation Services policies and that any violation of these policies may result in a cancellation or revocation.
Step 8
If you are renewing a vehicle parking permit, be sure to link your current vehicle(s) and license plate(s). To do so, check the box next to the vehicle(s) you would like linked then click Next.
You may have up to five vehicles linked to your permit, but you may only park one vehicle on campus at a time. If the vehicle you would like linked to your permit is not listed or you need to add vehicle information, you can do so by clicking Add Vehicle.
To avoid the risk of citation, it is important that the information of the vehicle(s) linked to your permit is accurate and up-to-date as all vehicle parking permits are enforced by License Plate Recognition (LPR) technology.
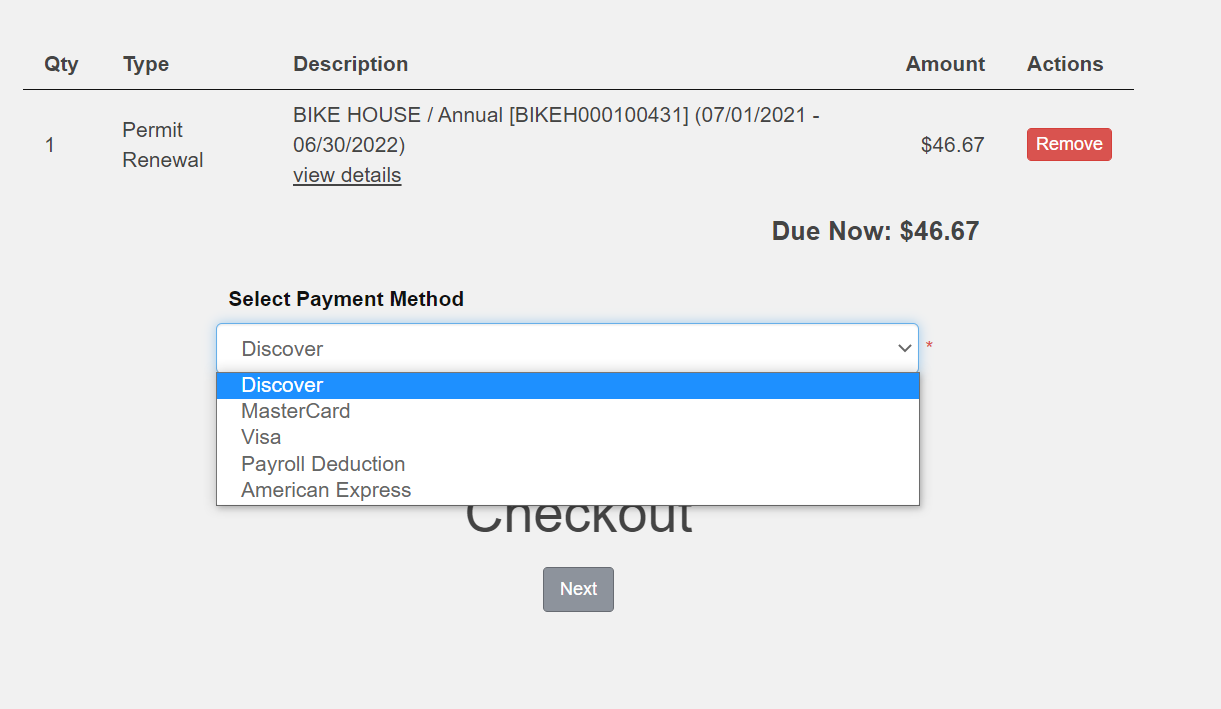
Step 9
Review the charges for your permit renewal and select the payment method you would like to pay with from the dropdown menu. Click Next.
Step 10
If you selected payroll deduction as your payment method, check the box to confirm that you understand and confirm the charges for your renewal before clicking Next to finalize.
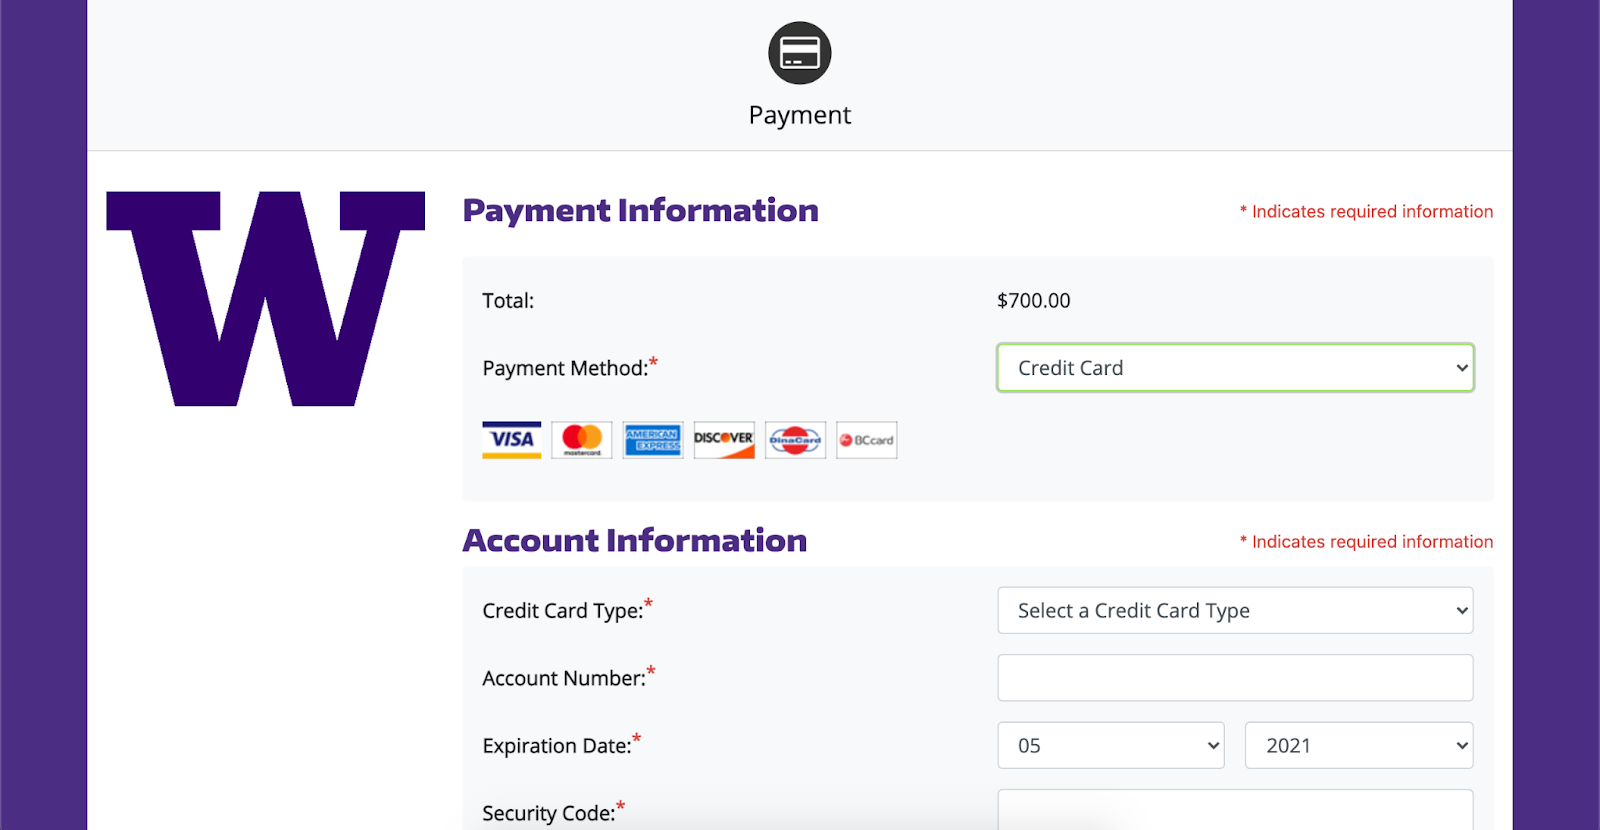
Step 11
If you selected a credit card as your payment method, you will be redirected to a screen to enter your credit card details.
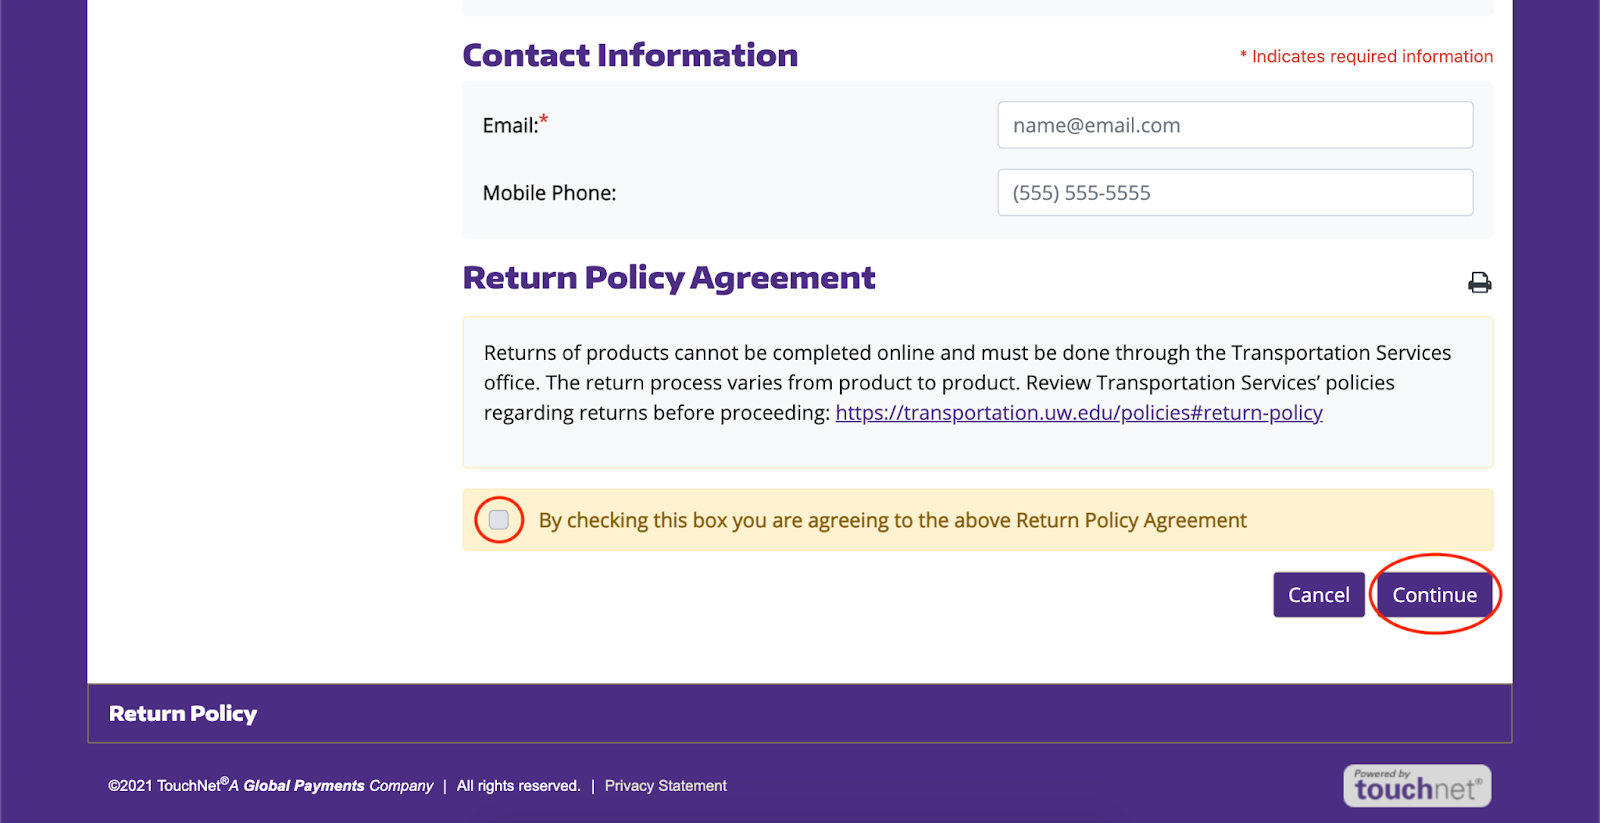
After entering all required information, check the box to confirm you have reviewed the applicable return policy information for the permit you are renewing, before clicking Continue to finalize.
Step 12
Your renewal is now complete! You will receive an email confirmation of the renewal transaction as well.
Remember, if you have multiple permits to renew, you will need to complete each renewal individually by following the same steps above.
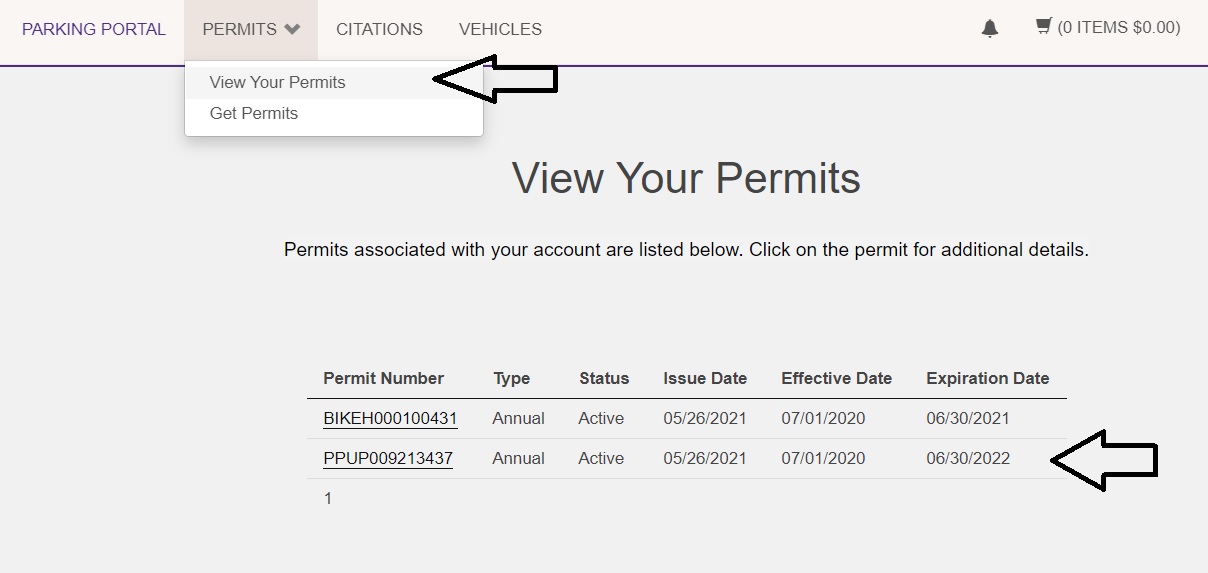
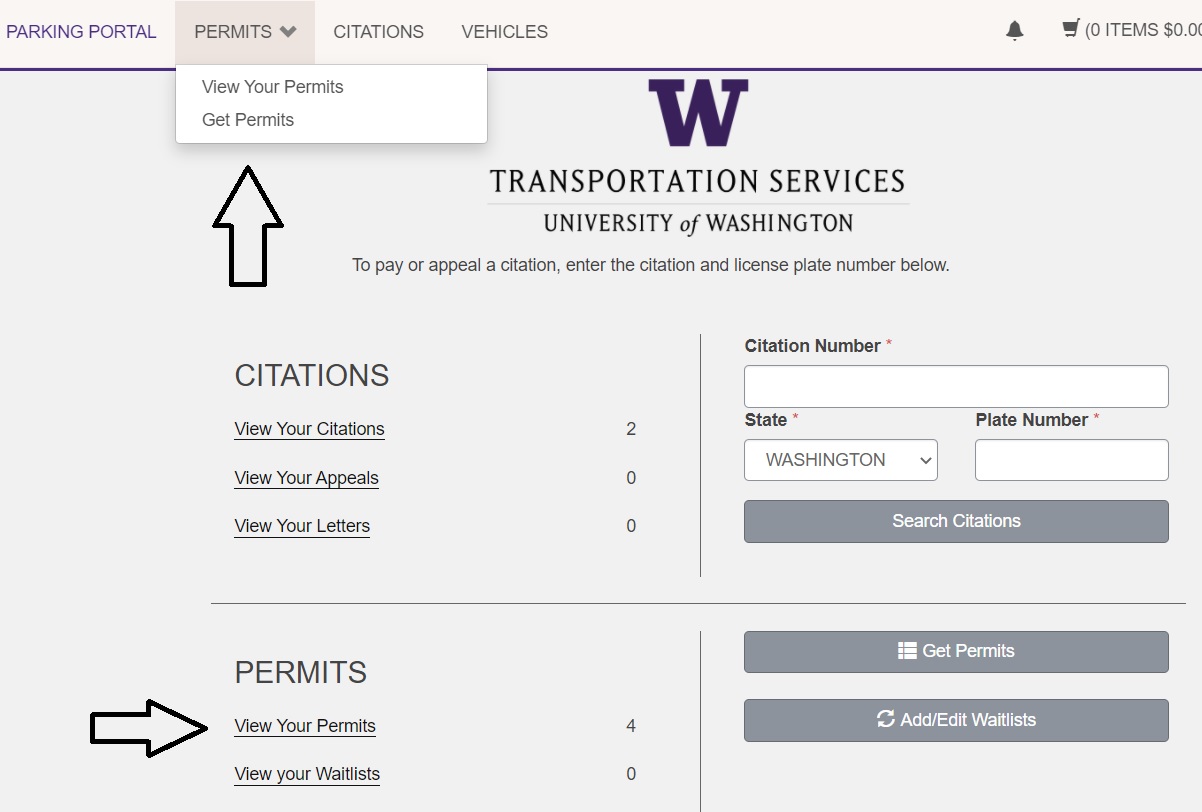
You can also confirm your renewal by clicking the Permits tab in the upper navigation bar, selecting View Your Permits and noting the updated expiration date of the appropriate permit.
These videos walk you through some of the most common tasks in the customer portal.
Adding a vehicle to your account
Removing a vehicle from your account
Purchasing a Bike house permit
Purchasing a Daily permit
Purchasing an SOV permit
In the video below, payment is shown using a credit card. Employees who are eligible to use payroll deduction may also select that option on the portal.
Purchasing a Motorcycle permit
Purchasing Night Overtime parking
Obtaining a UW Retiree permit
Appealing a parking citation
Paying a parking citation
Renewing an Annual permit during Annual Renewal
You can have up to five vehicles linked to your account and applicable permits. Only one vehicle may be parked on campus at a time. It is important to enter your license plate number and other vehicle information accurately to avoid the risk of a citation.
Adding and changing vehicles
Step 1
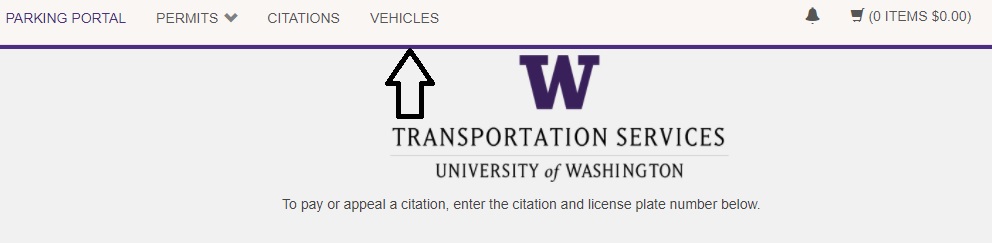
To add or edit your vehicle information, click the Vehicles tab in the top navigation bar.
Step 2
To update your existing vehicle information, click on the license plate of the vehicle you would like to edit.
Step 3
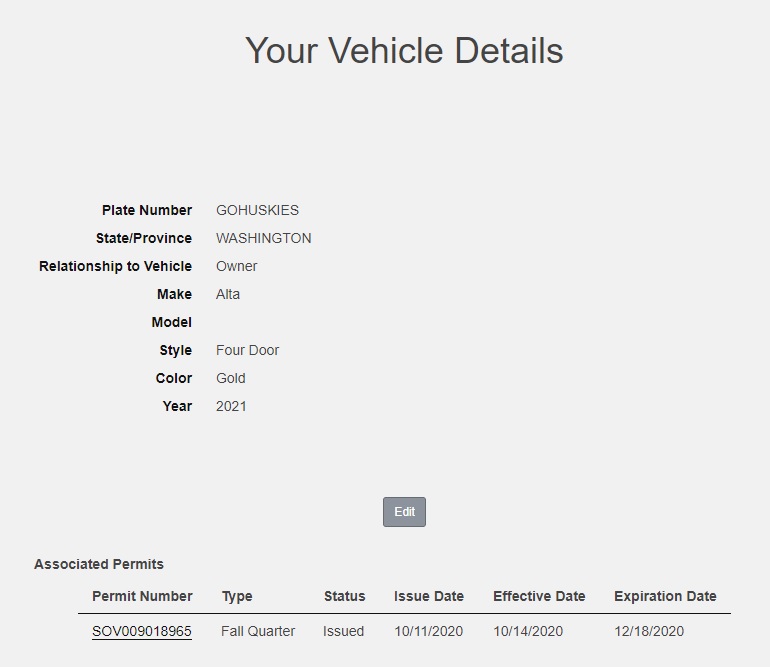
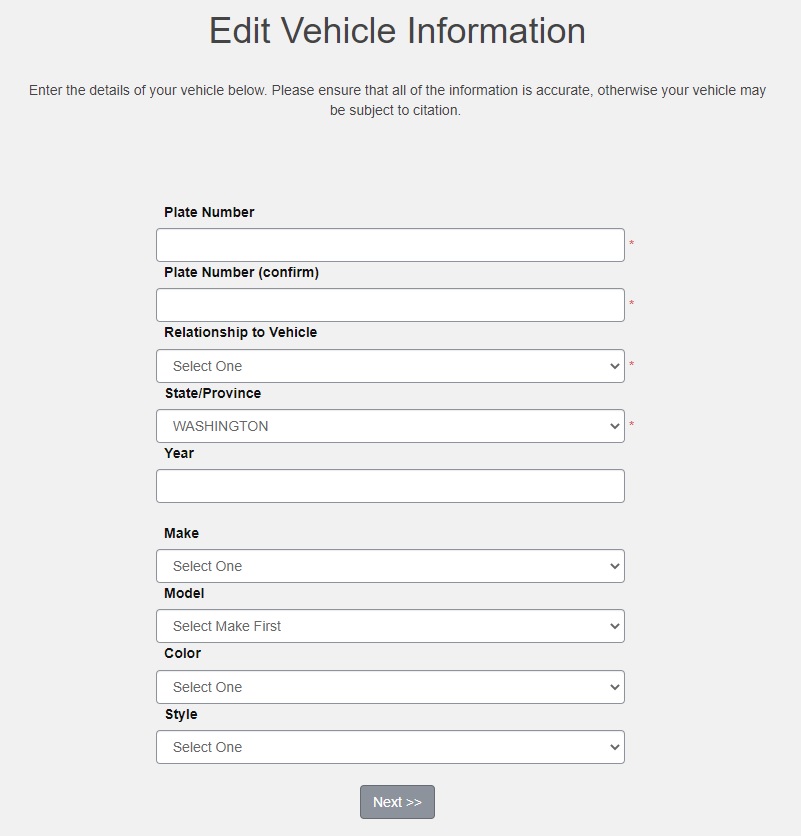
You will be able to see the permits linked to the selected vehicle. Click Edit and update the vehicle information in the appropriate fields.
Please ensure all information entered is accurate and that you enter your license plate number the way it appears on your vehicle registration. Otherwise, your vehicle may be subject to citation.
Click Next once you have edited the desired details.
Step 4
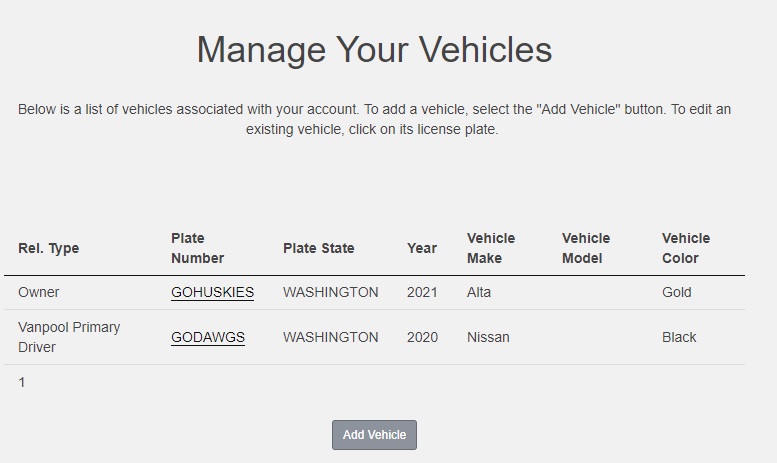
To add a new vehicle to your account, click Add Vehicle and fill in the appropriate fields. Please ensure all information entered is accurate and that you enter your license plate number the way it appears on your vehicle registration. Otherwise, your vehicle may be subject to citation.
Click Next to finalize the addition of your vehicle.
Step 5
You can view and edit the vehicles associated with your permit(s). Click View Your Permits either in the account dashboard or through the Permits tab in the top navigation bar.
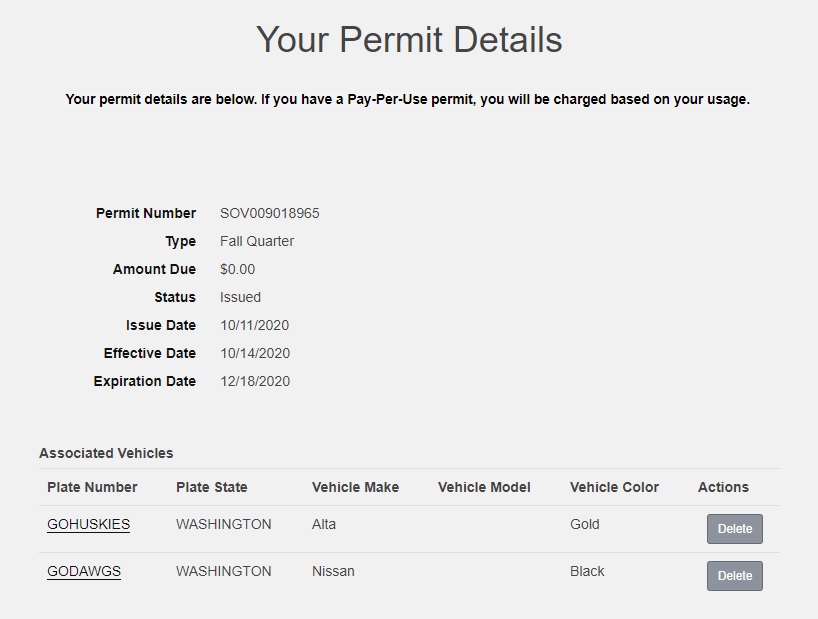
Step 6
Click on the permit number to view the permit details. You can remove vehicles from a permit by clicking Delete next to the vehicle you would like removed. This will remove the vehicle from the permit, but will not remove it from your account.

Changing account information
Step 1
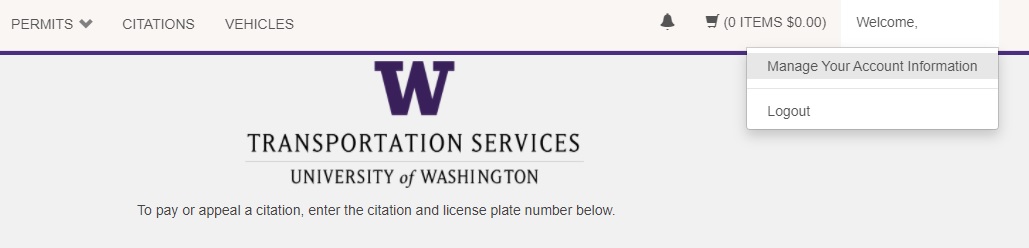
You can edit the information on your account by clicking on your name in the top right corner of the customer portal and clicking Manage Your Account Information.
Step 2
While you can have multiple email addresses on your account, email confirmations will only be sent to the email address that is at the top of your email address list. Click Add or Edit next to the email address or account information you would like to modify.
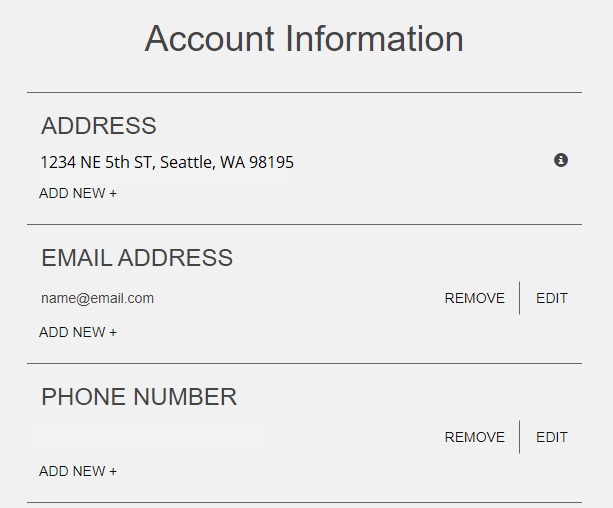
Other account information cannot be modified through the customer portal because it is pulled from other UW systems such as Workday. To change your home address in Workday, see this guide from the ISC.